
Checks run through the API. There is no screen for uploading a photo and getting a Register, Authenticate, or Compare result back. That work happens in your integration — see Face authentication. The dashboard is where you organize collections beforehand and review what happened afterward.
What you can do
Each action is logged separately, and every check is tagged with a reference ID — a unique label you supply, or that the system generates, so you can find that exact record later.Where to find it
Open Verify → Face Authentication in the sidebar, next to Individual and Business. It is available on every account — there is nothing to request or turn on. The section has two pages: Collections and Face Logs.Collections
A collection is a named group of registered faces. You might keep one collection for customers and another for staff. A person’s photo lives inside a collection once it has been registered.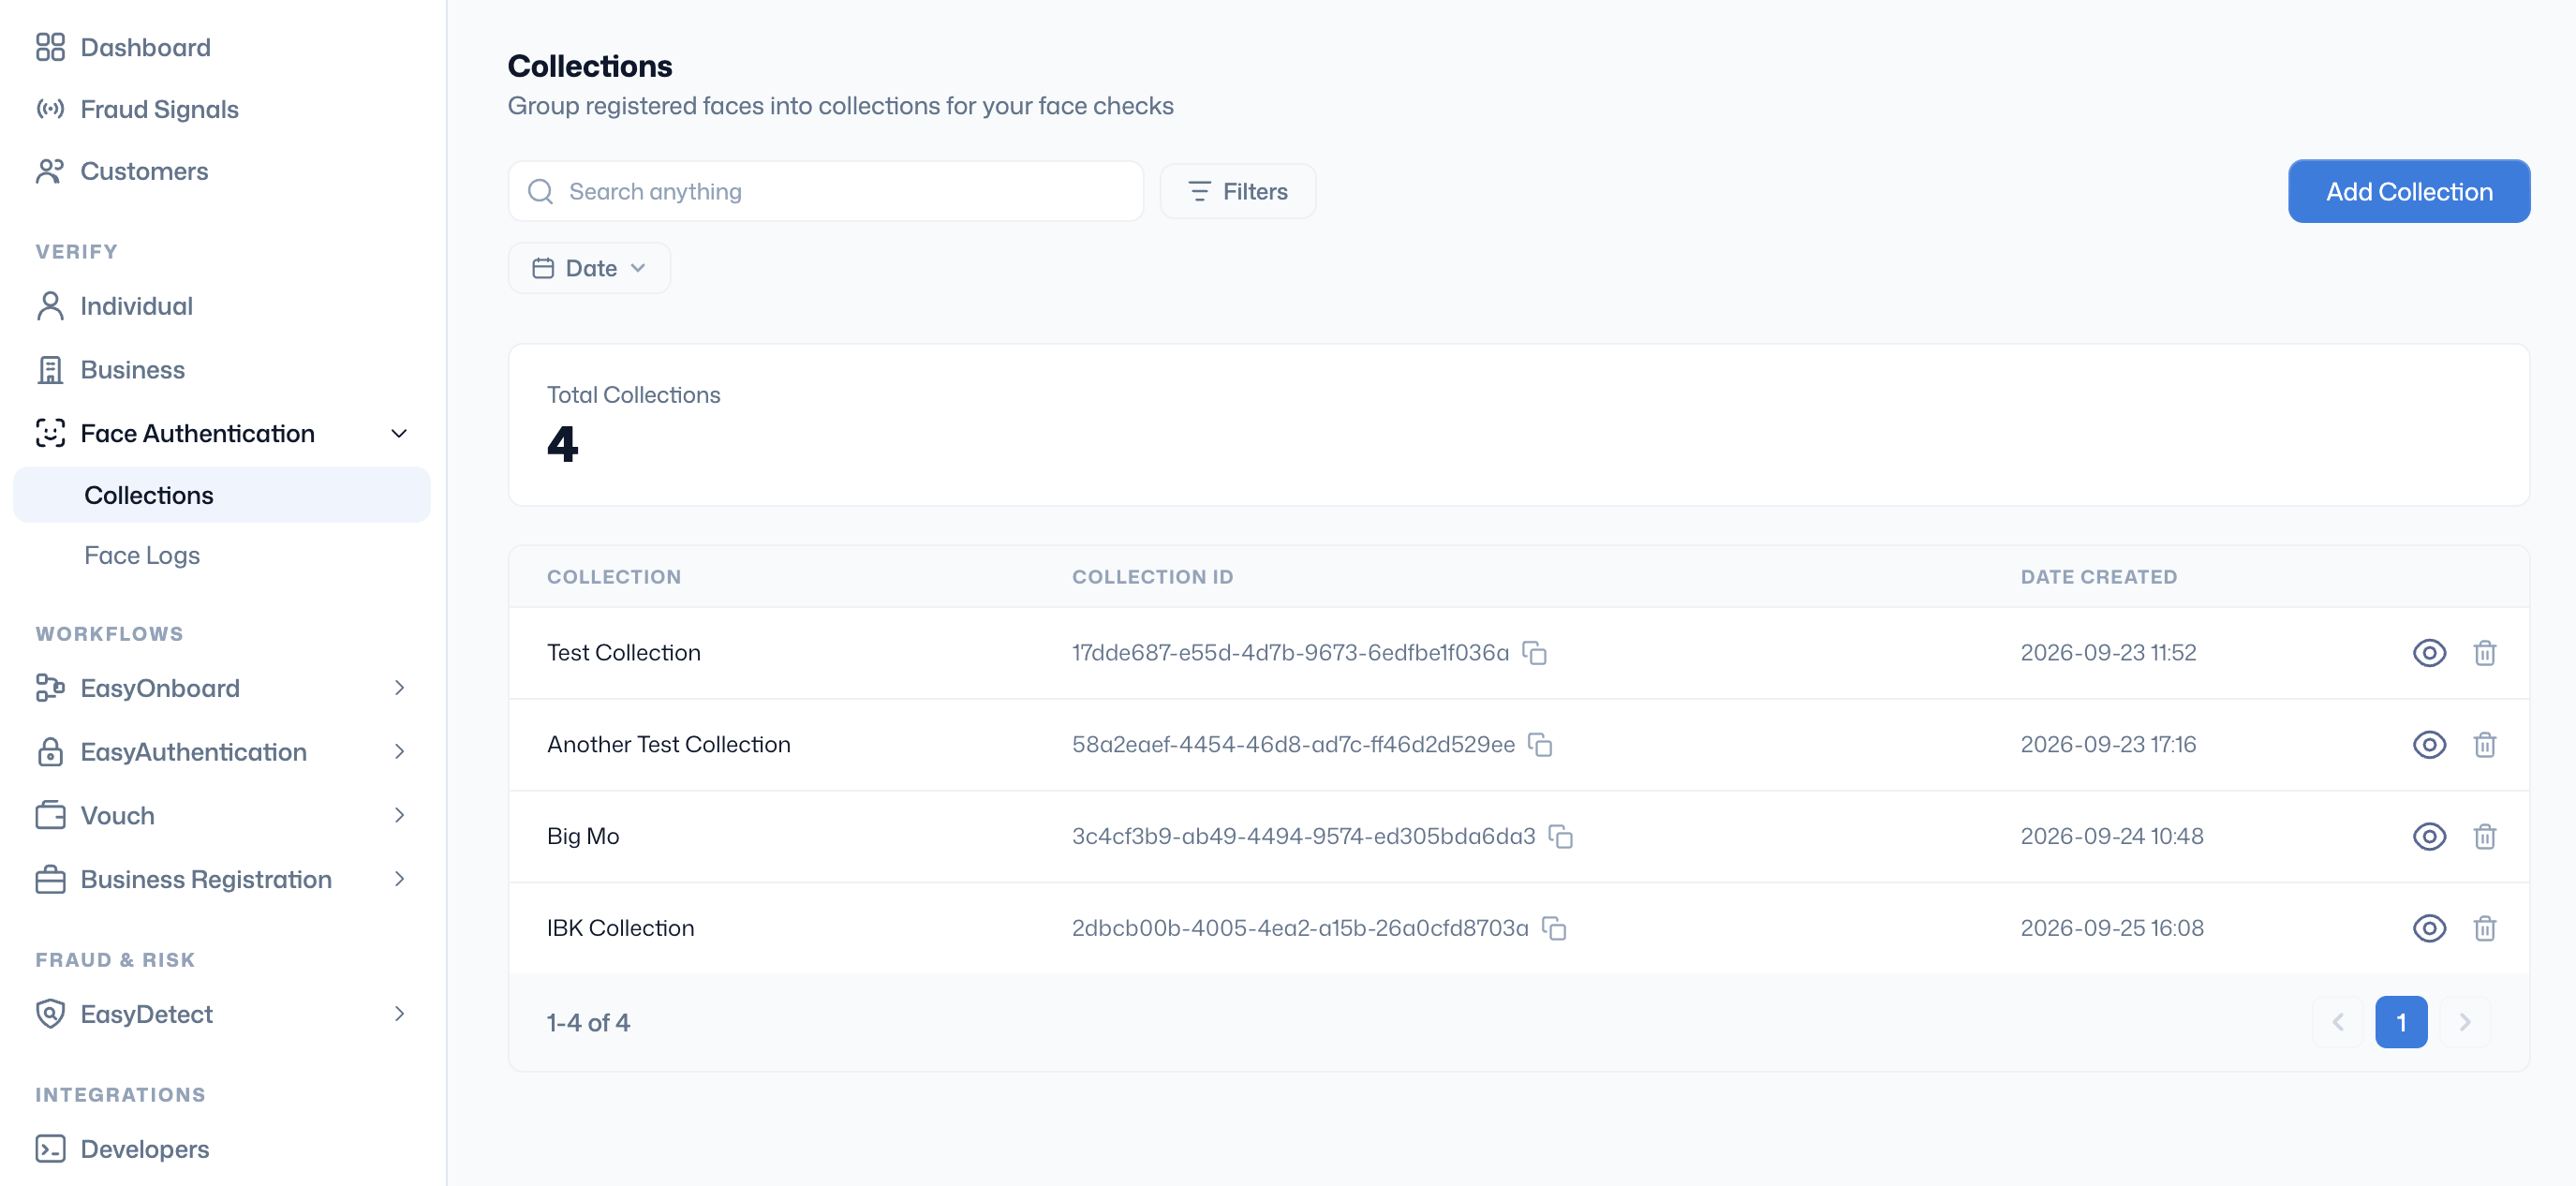
Create collections from the dashboard, then register faces into them with Enrol a user.
Face Logs
Face Logs is a read-only history of every check on the account: Register, Authenticate, and Compare.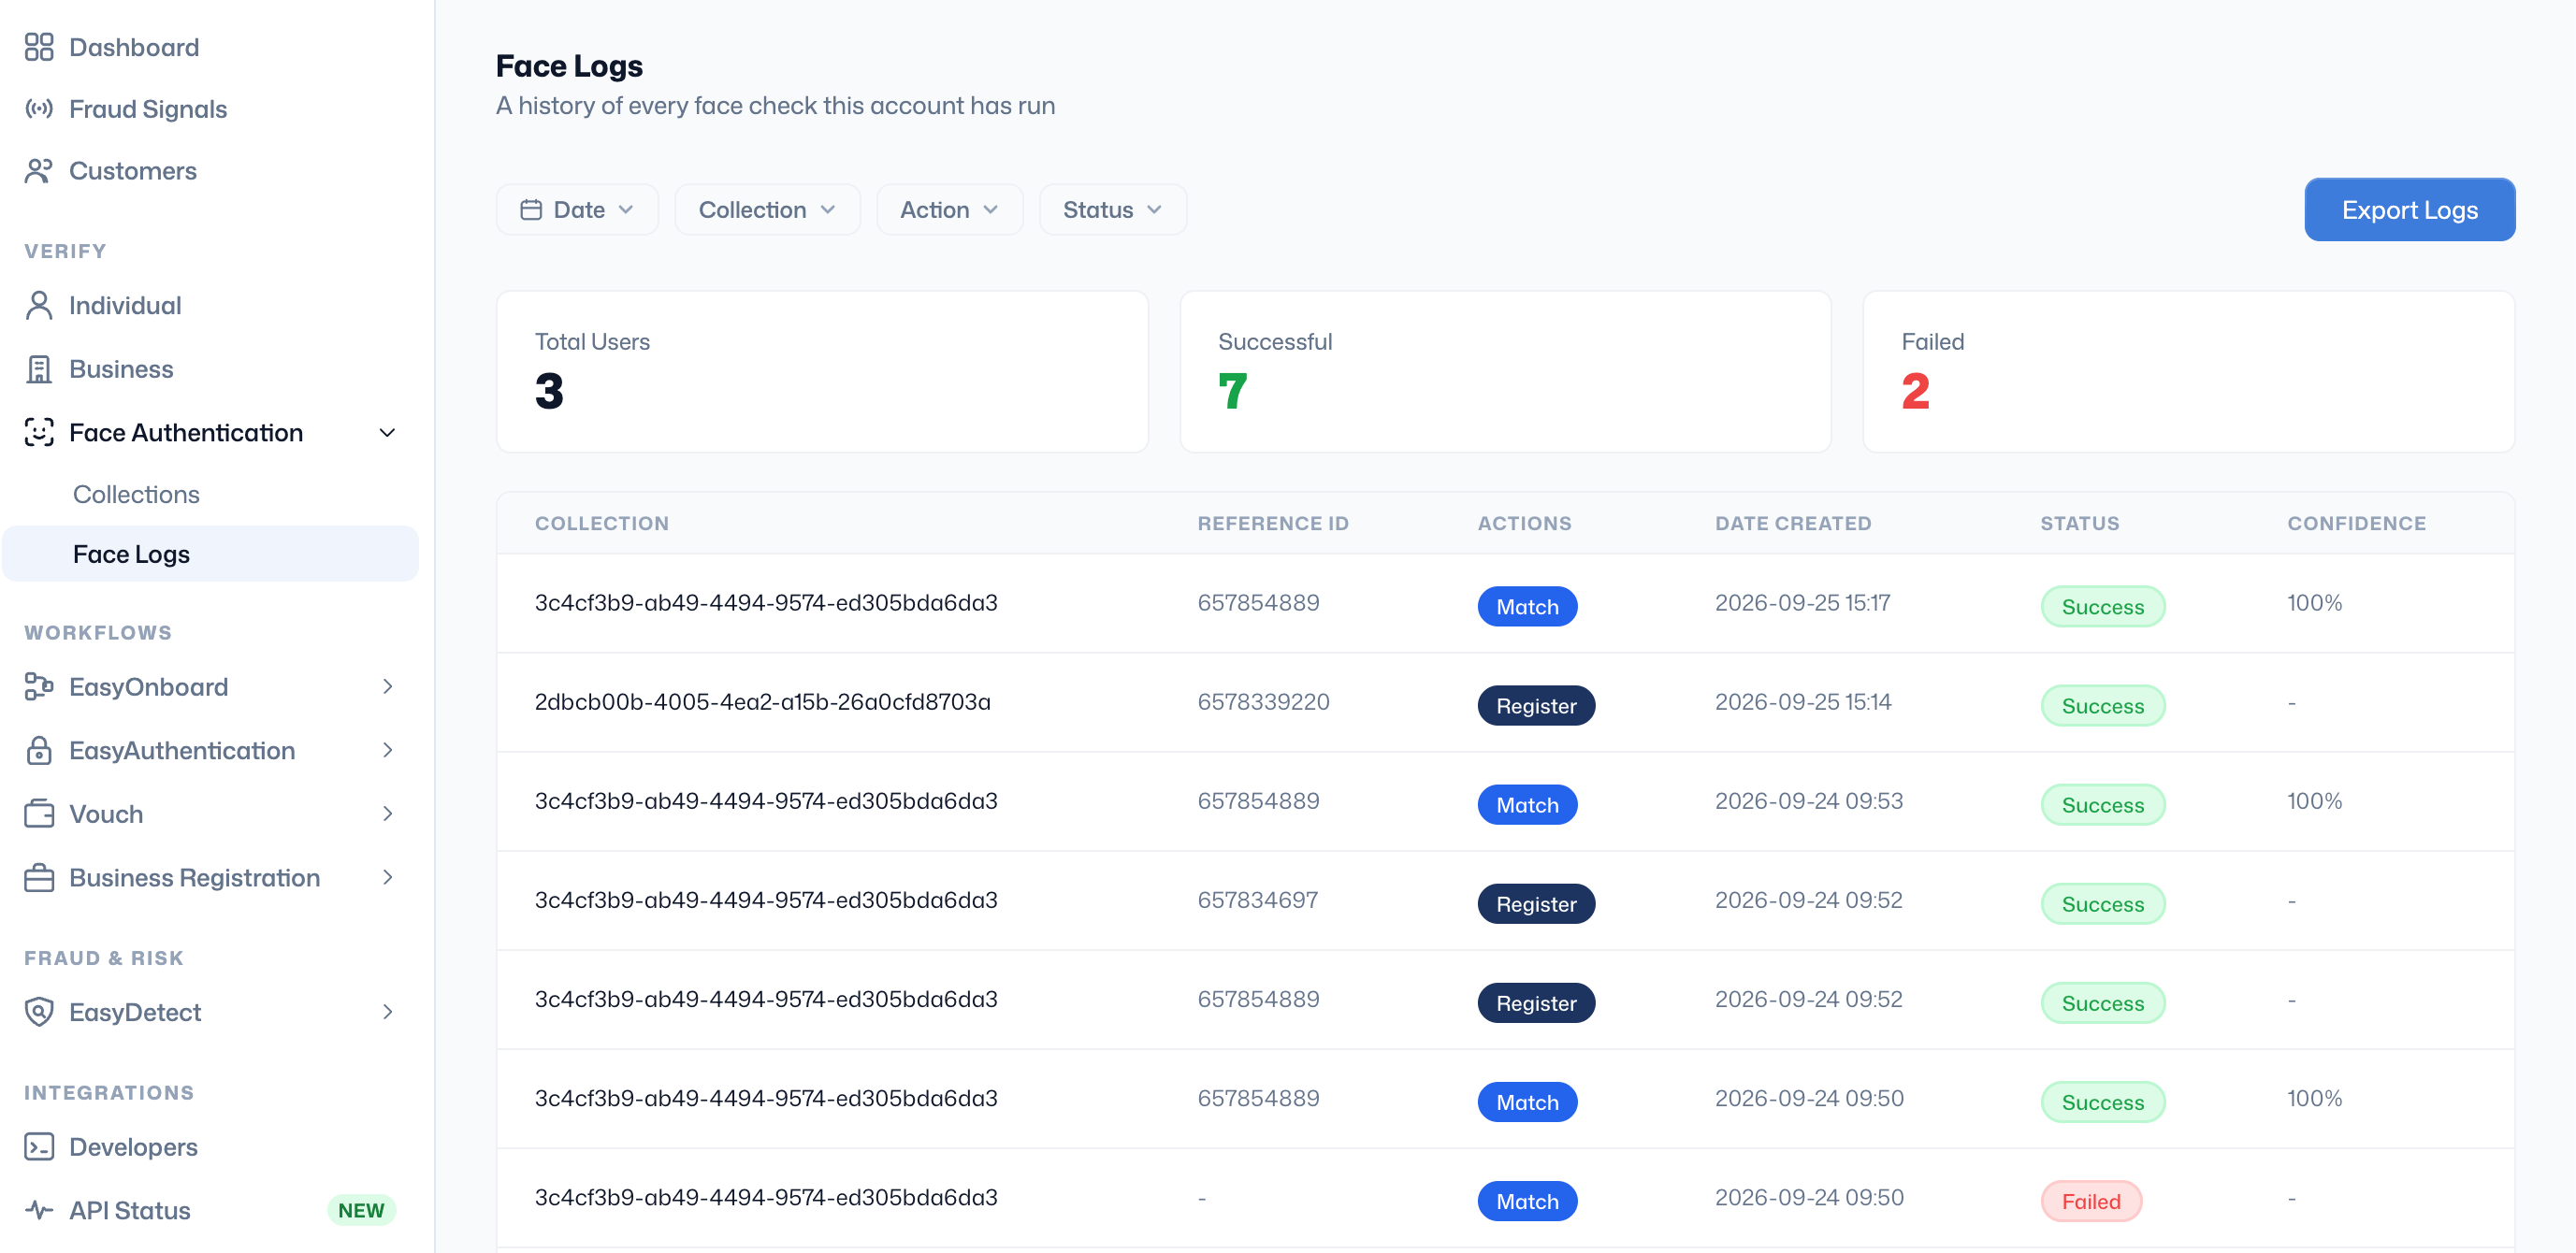
Filter by date, collection, action, or status. Search for a specific check by its reference ID, or Export Log to download the history as a file.
Collections and reference IDs
A reference ID is the unique label on one person’s record inside a collection — for example a customer ID or account number you already use. Authenticate a user looks the person up by that reference ID inside a collection to find the photo it should compare against. Compare two faces does not use a collection, because neither photo needs to be registered first. The check still carries a reference ID so you can find it in Face Logs later.How a returning-user check works
- Register a person. Submit a photo with a collection name and a reference ID. That photo is now on file.
- The person comes back — to log in, complete a transaction, or pass a checkpoint.
- Submit a new photo with the same reference ID and collection used at registration.
- Face Authentication compares the two and returns a match or no-match result, plus a confidence score.
- Act on the result — let the person through, flag the account, or ask for another check. The check is now in Face Logs.
Reading a result
Frequently asked questions
Where do I run a face check?
Where do I run a face check?
From your own integration, through the API. Register uses Enrol a user, Authenticate uses Authenticate a user, and Compare uses Compare two faces. The dashboard is for creating collections and reviewing Face Logs.
What is a collection?
What is a collection?
A named group of registered faces — for example one collection for customers and another for staff. Create one from Verify → Face Authentication → Collections with Add Collection. You only need a name.
What is a reference ID?
What is a reference ID?
The unique label on one person’s record inside a collection, such as a customer ID you already use. Authenticate uses it to find the photo on file. Compare still carries a reference ID so the check can be found in Face Logs, even though it does not use a collection.
Does “no match” mean the check failed?
Does “no match” mean the check failed?
No match means the check ran and the two photos were judged to be different people. Failed means the check could not finish — for example a photo was missing, or the record could not be found.