Documentation Index

Fetch the complete documentation index at: https://docs.dojah.io/llms.txt

Use this file to discover all available pages before exploring further.

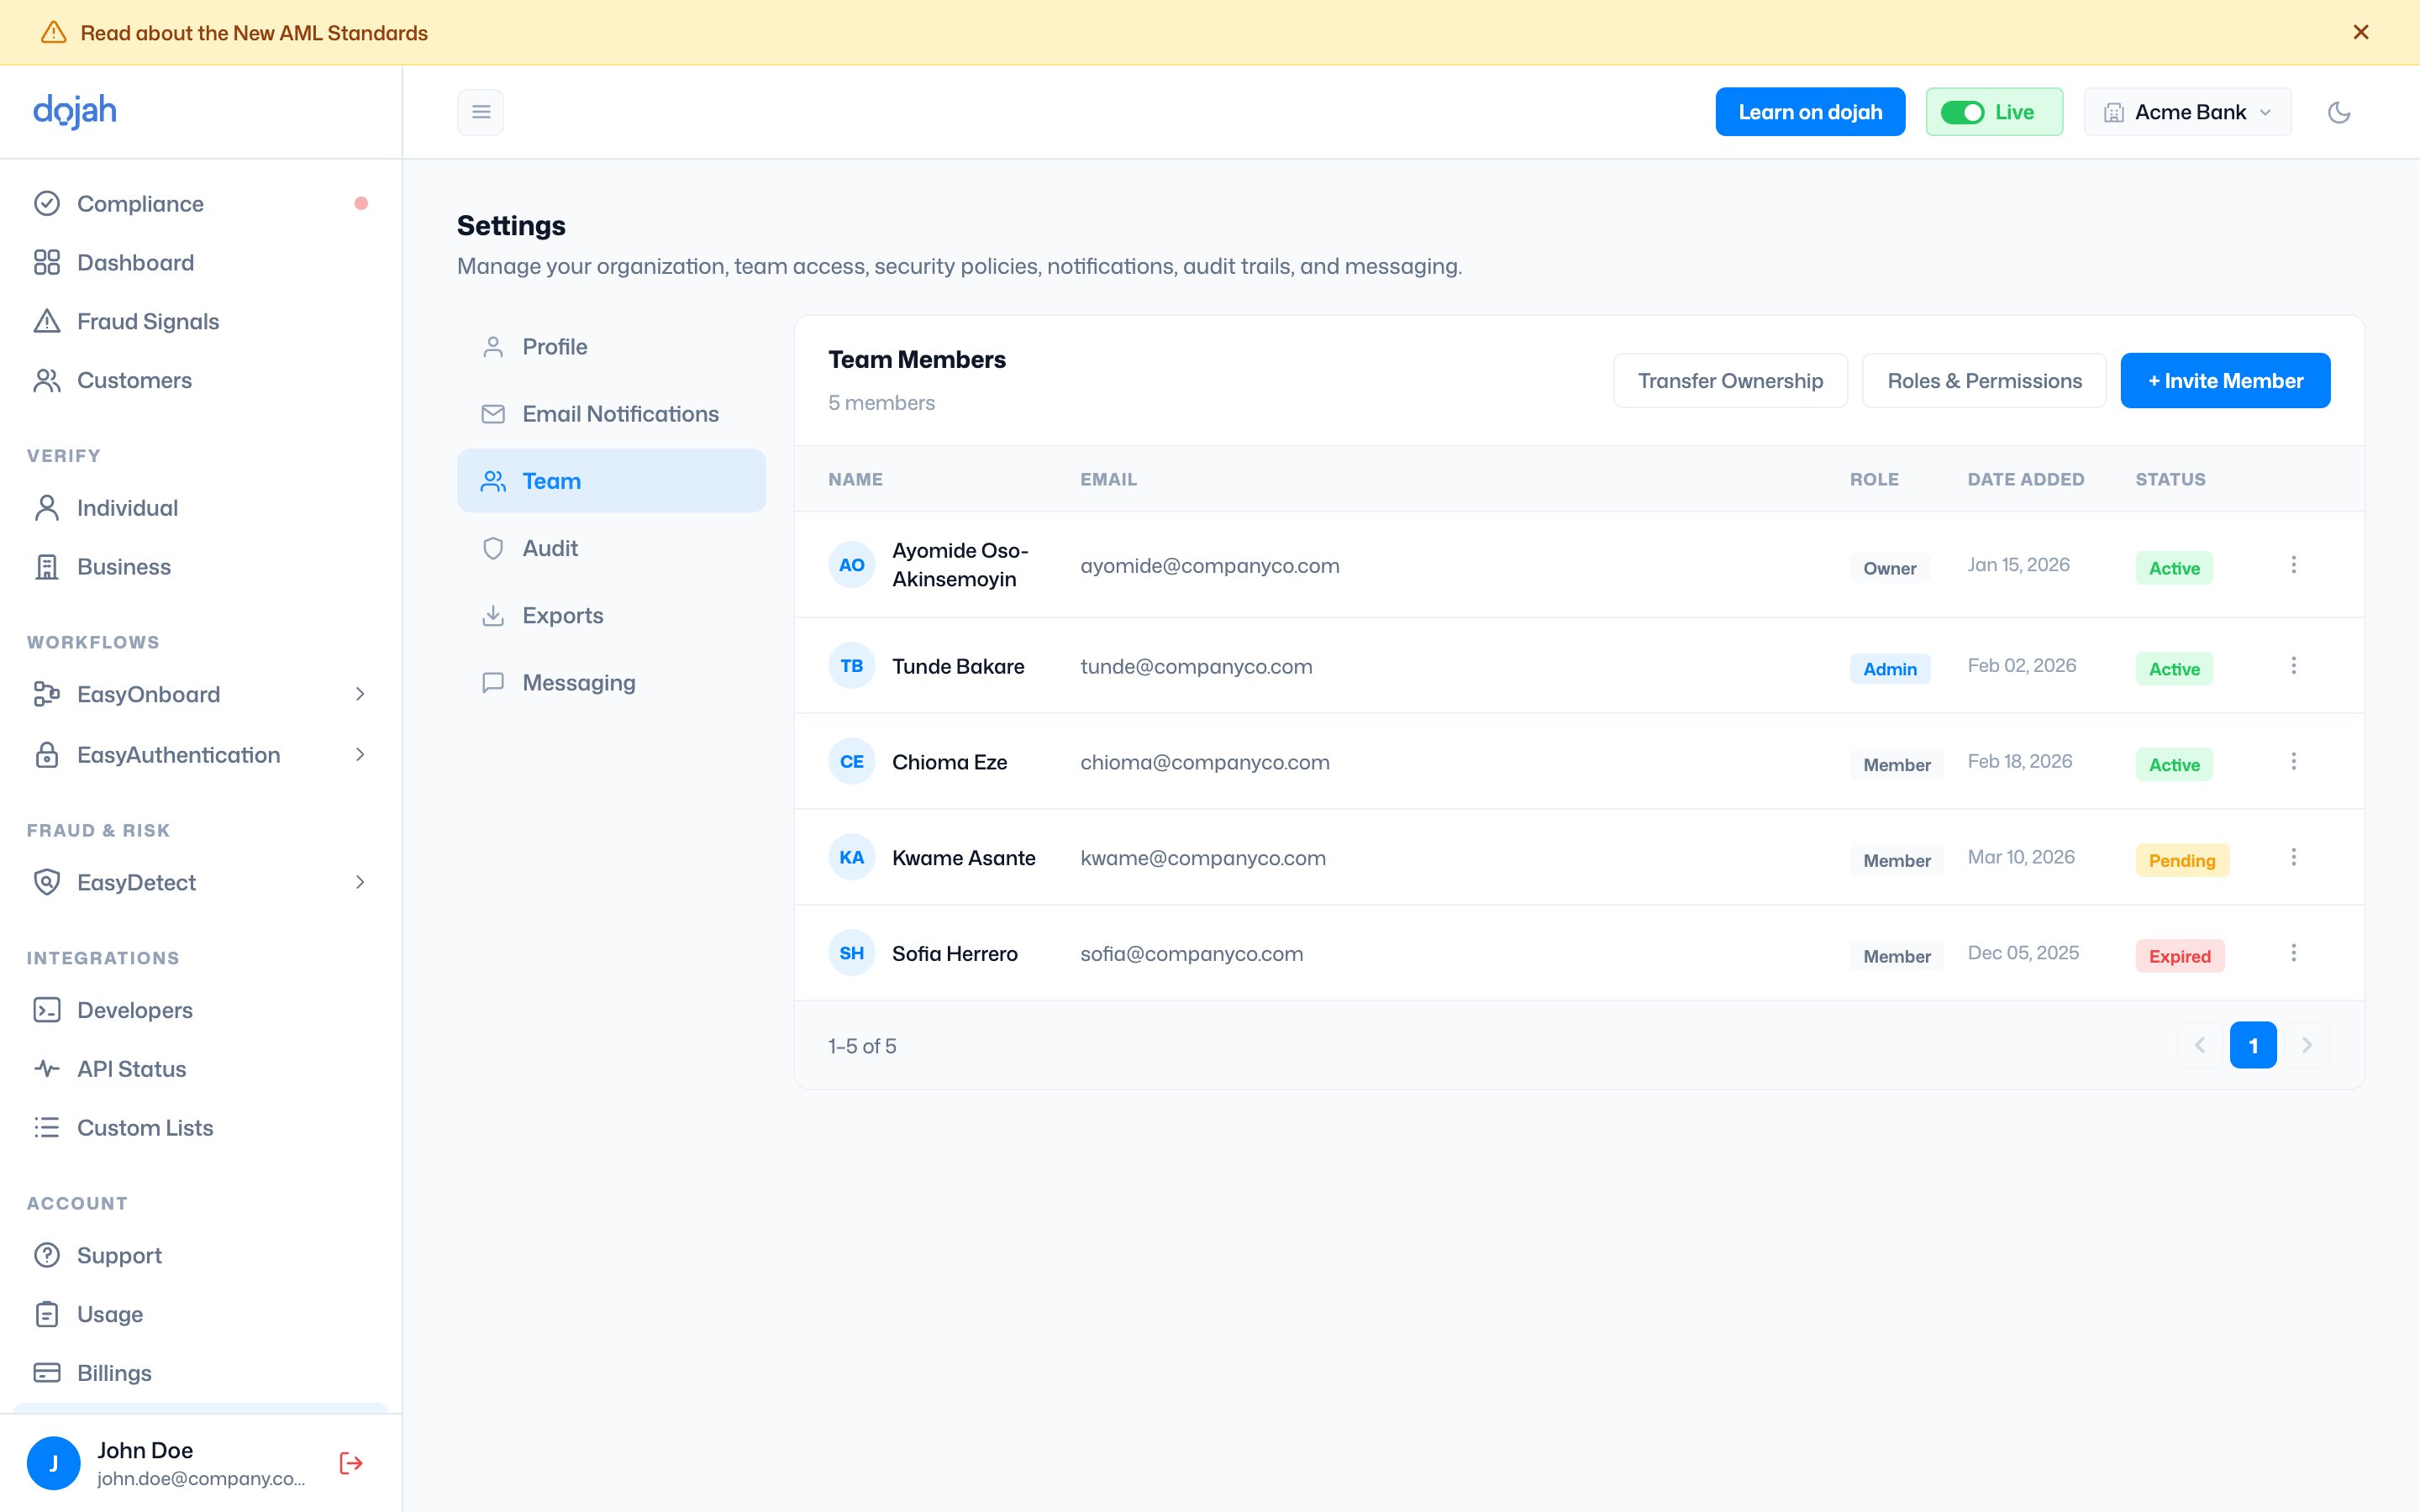
The Team page is where you manage everyone who has access to your Dojah account. You can invite new members, assign roles that control what each person can see and do, and remove access when it is no longer needed.

The team member list

The list shows every person who has been invited to your account, along with their email, assigned role, when they were added, and their current status. ‘Active’ means the invitation was accepted and the team member can log in. ‘In Active’ means the invitation hasn’t been accepted and team member hasn’t logged in. ‘Expired’ means the invitation was sent but was not accepted within the allowed window. The person cannot access the account. You can resend the invitation by editing their record. ‘Owner’ is a special status shown on the account creator. The Owner has full access to everything on the account and cannot be removed by other team members.

Inviting a new team member

Click ’+ Invite Member’ to open the invitation modal. Fill in the following: Email Address: Enter the email address of the person you are inviting. They will receive an invitation to create or link a Dojah account. Role: Select the role that defines what this person can access. The available roles are the ones you have configured in Roles & Permissions; see that section below. App (optional): Restrict the team member’s access to a specific app or set of apps within your account. Use this to limit a developer or analyst to only the data from the integration they work on. You can also create a new app directly from this modal using the + Create a new app link. Click Send Invite to dispatch the invitation email.

Roles & Permissions

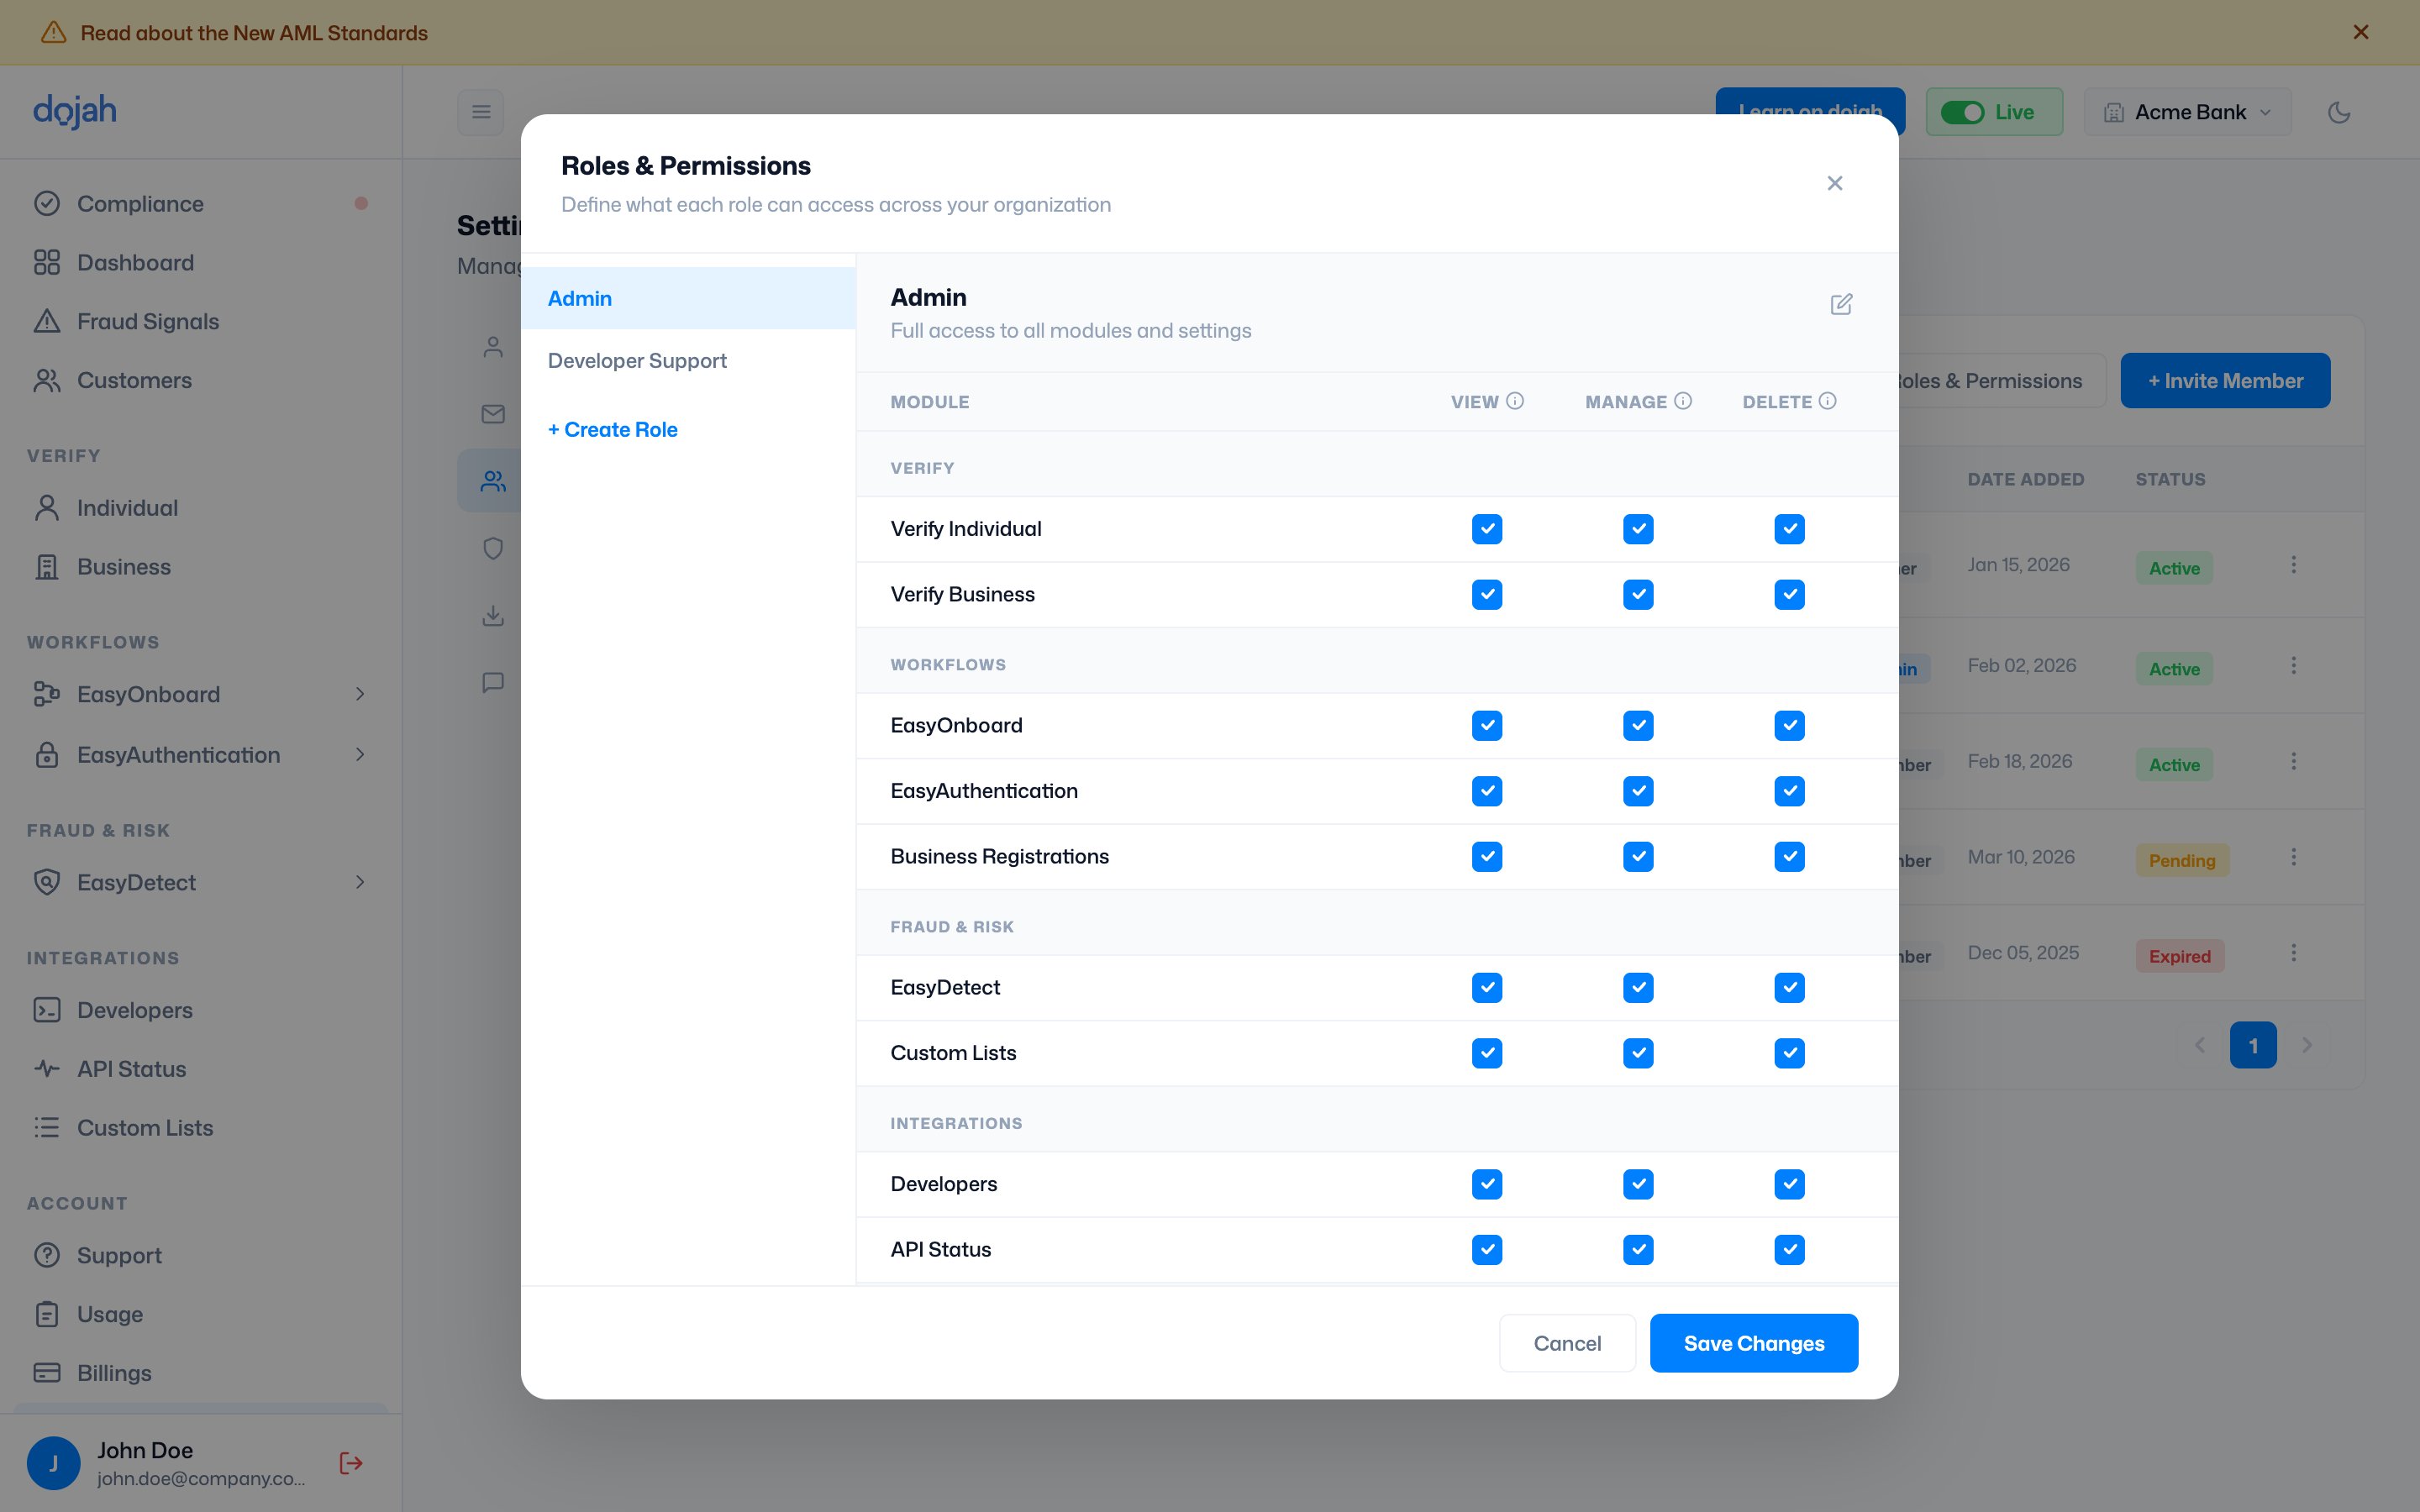
Click Roles & Permissions to open the full permissions management modal. This is where you define exactly what each role can do across every module on the platform. The left panel lists all existing roles on your account. The roles visible by default include Developer Support, Product, and Admin. You can also create custom roles using + Create Role. Selecting any role on the left shows its permissions matrix on the right. Permissions are organised by platform section, Verify, Workflows, Fraud & Risk, Integrations, and Account, and each module within those sections can be granted three levels of access: View: the team member can see the data in that module but cannot make changes. Manage: the team member can view and make changes, such as running new lookups, creating EasyDetect rules, or updating settings. Delete: the team member can remove records, rules, or data within that module. A filled green checkbox means the permission is granted. An empty checkbox means it is not. You can mix and match permissions across modules to create precisely scoped roles, for example, a compliance analyst role that can view and manage individual verification and AML screening but has no access to developers or billings. Click Save Changes to apply any updates to a role’s permissions. Changes take effect immediately for all team members assigned that role. Click ‘Delete role’ to permanently remove a role; you will need to reassign any team members currently holding it before deletion.

Editing or removing a team member

Click the edit icon on any team member row to update their role or app assignment. Click the delete icon to remove their access entirely. Removing a team member revokes their login immediately; they will not be able to access the dashboard on their next visit.