
Creating a Flow:
You begin by clicking the “Create flow” button, which then presents you with a set of options to either build your own custom set of rules or use one of our vetted, pre-configured setup (templates). Both methods allow you to quickly establish a monitoring environment tailored to your needs.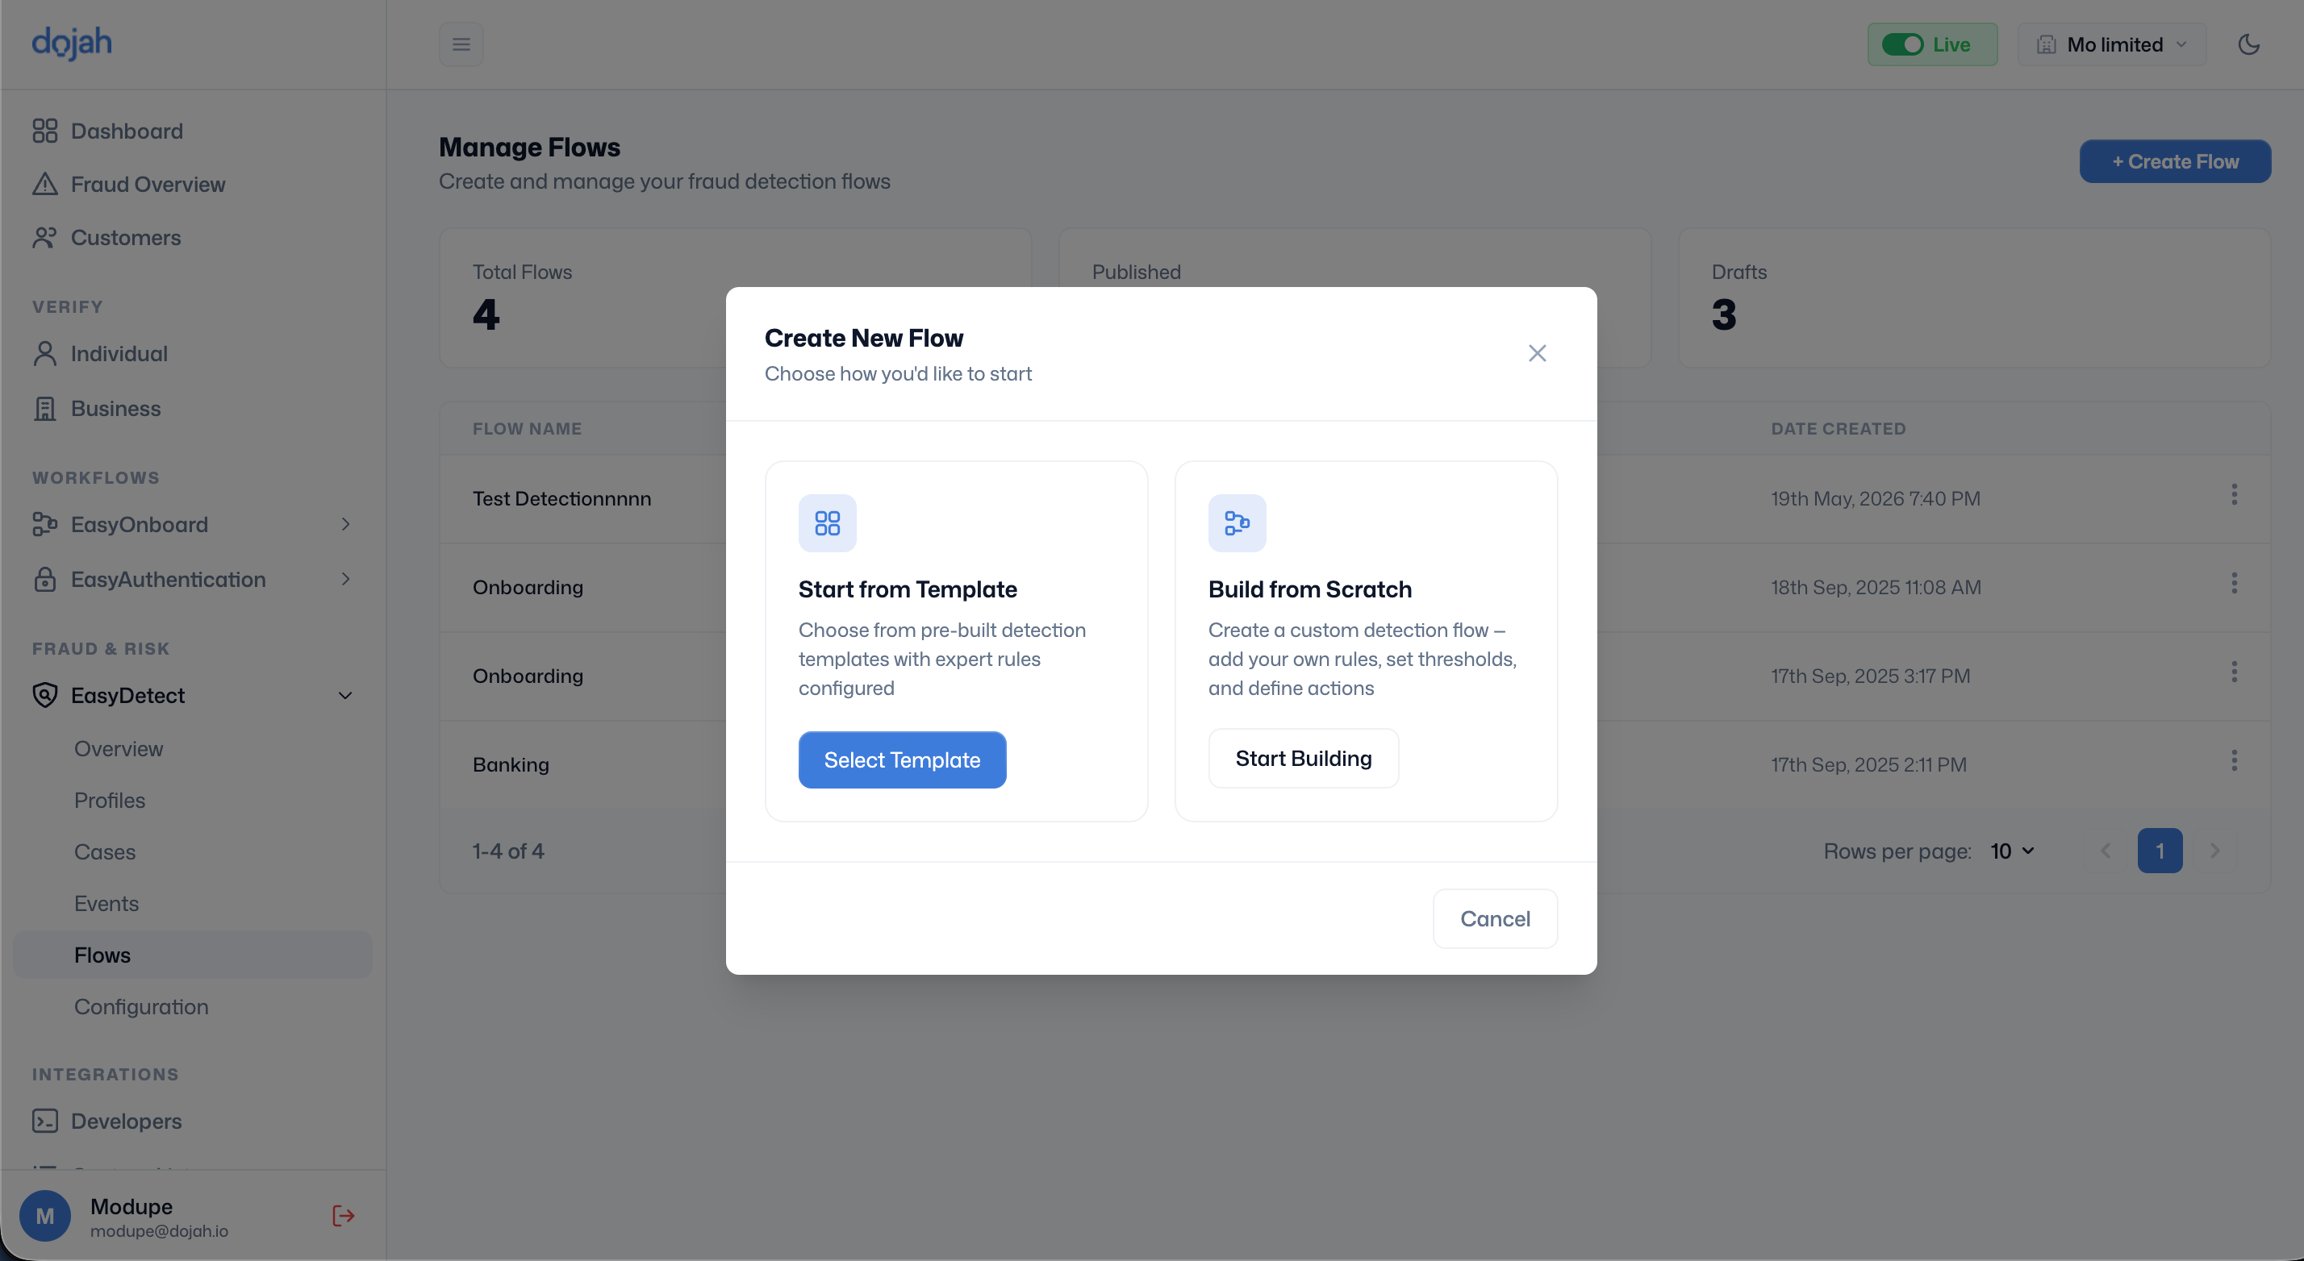
Creating a Flow from Scratch
- Navigate to the “Flows” section, where you will see a list of your existing flows.
- Click the “Create flow” button, located on the top-right corner of the screen.
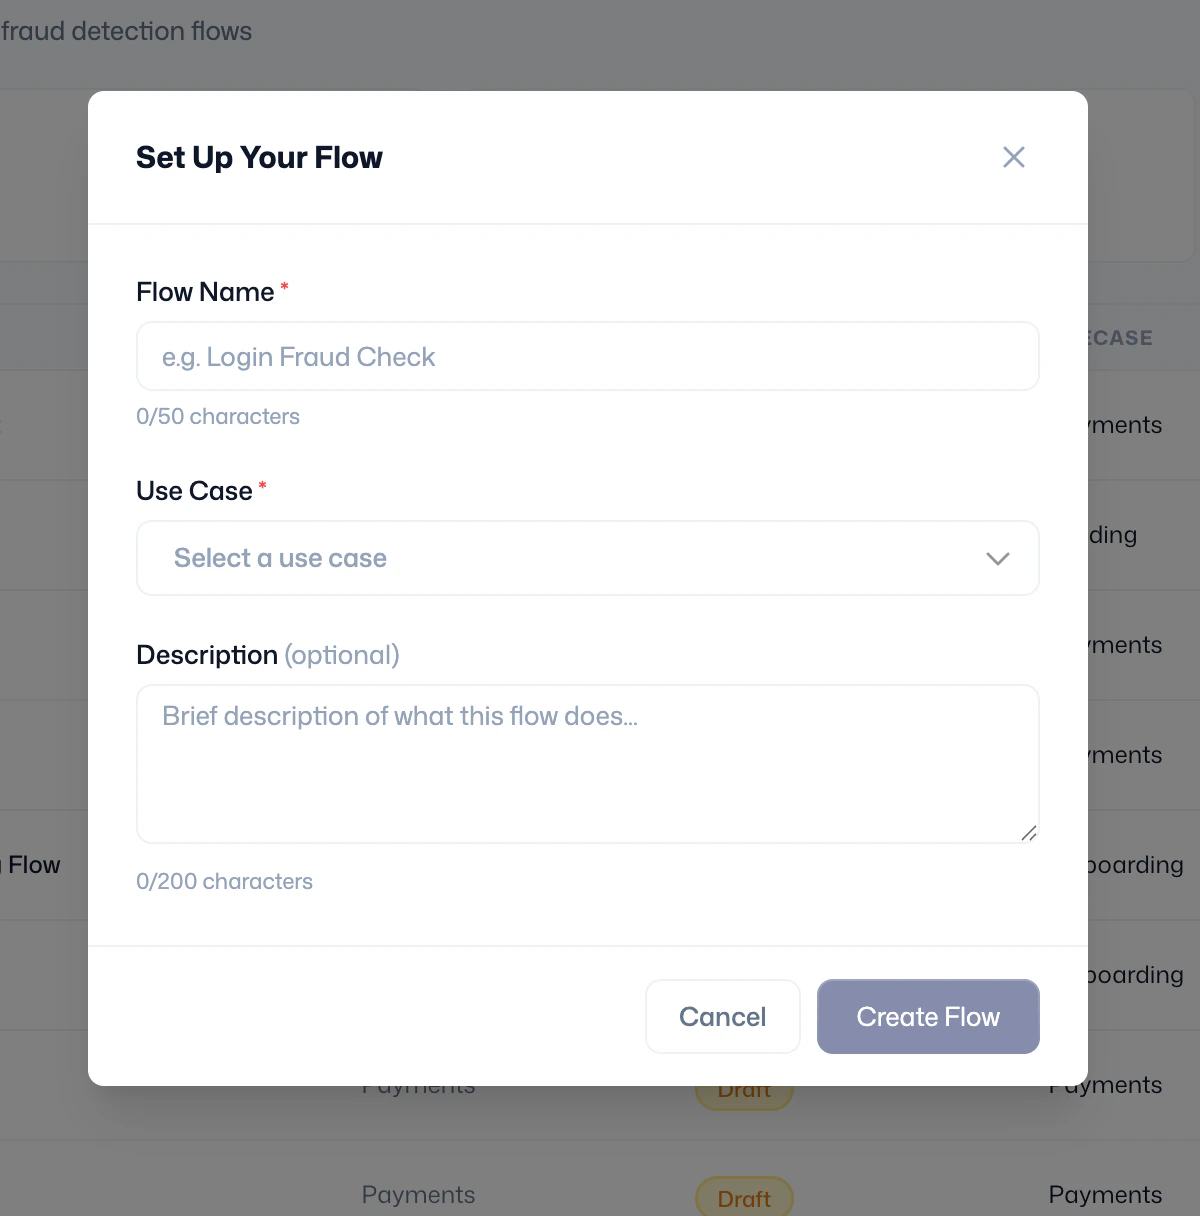
- A pop-up window will appear, prompting you for the following details:
- Flow Name: A unique name for your flow.
- Use Case: Select a use case from the dropdown menu (e.g., Banking, Lending).
- Description (Optional): Add a brief description for your reference.
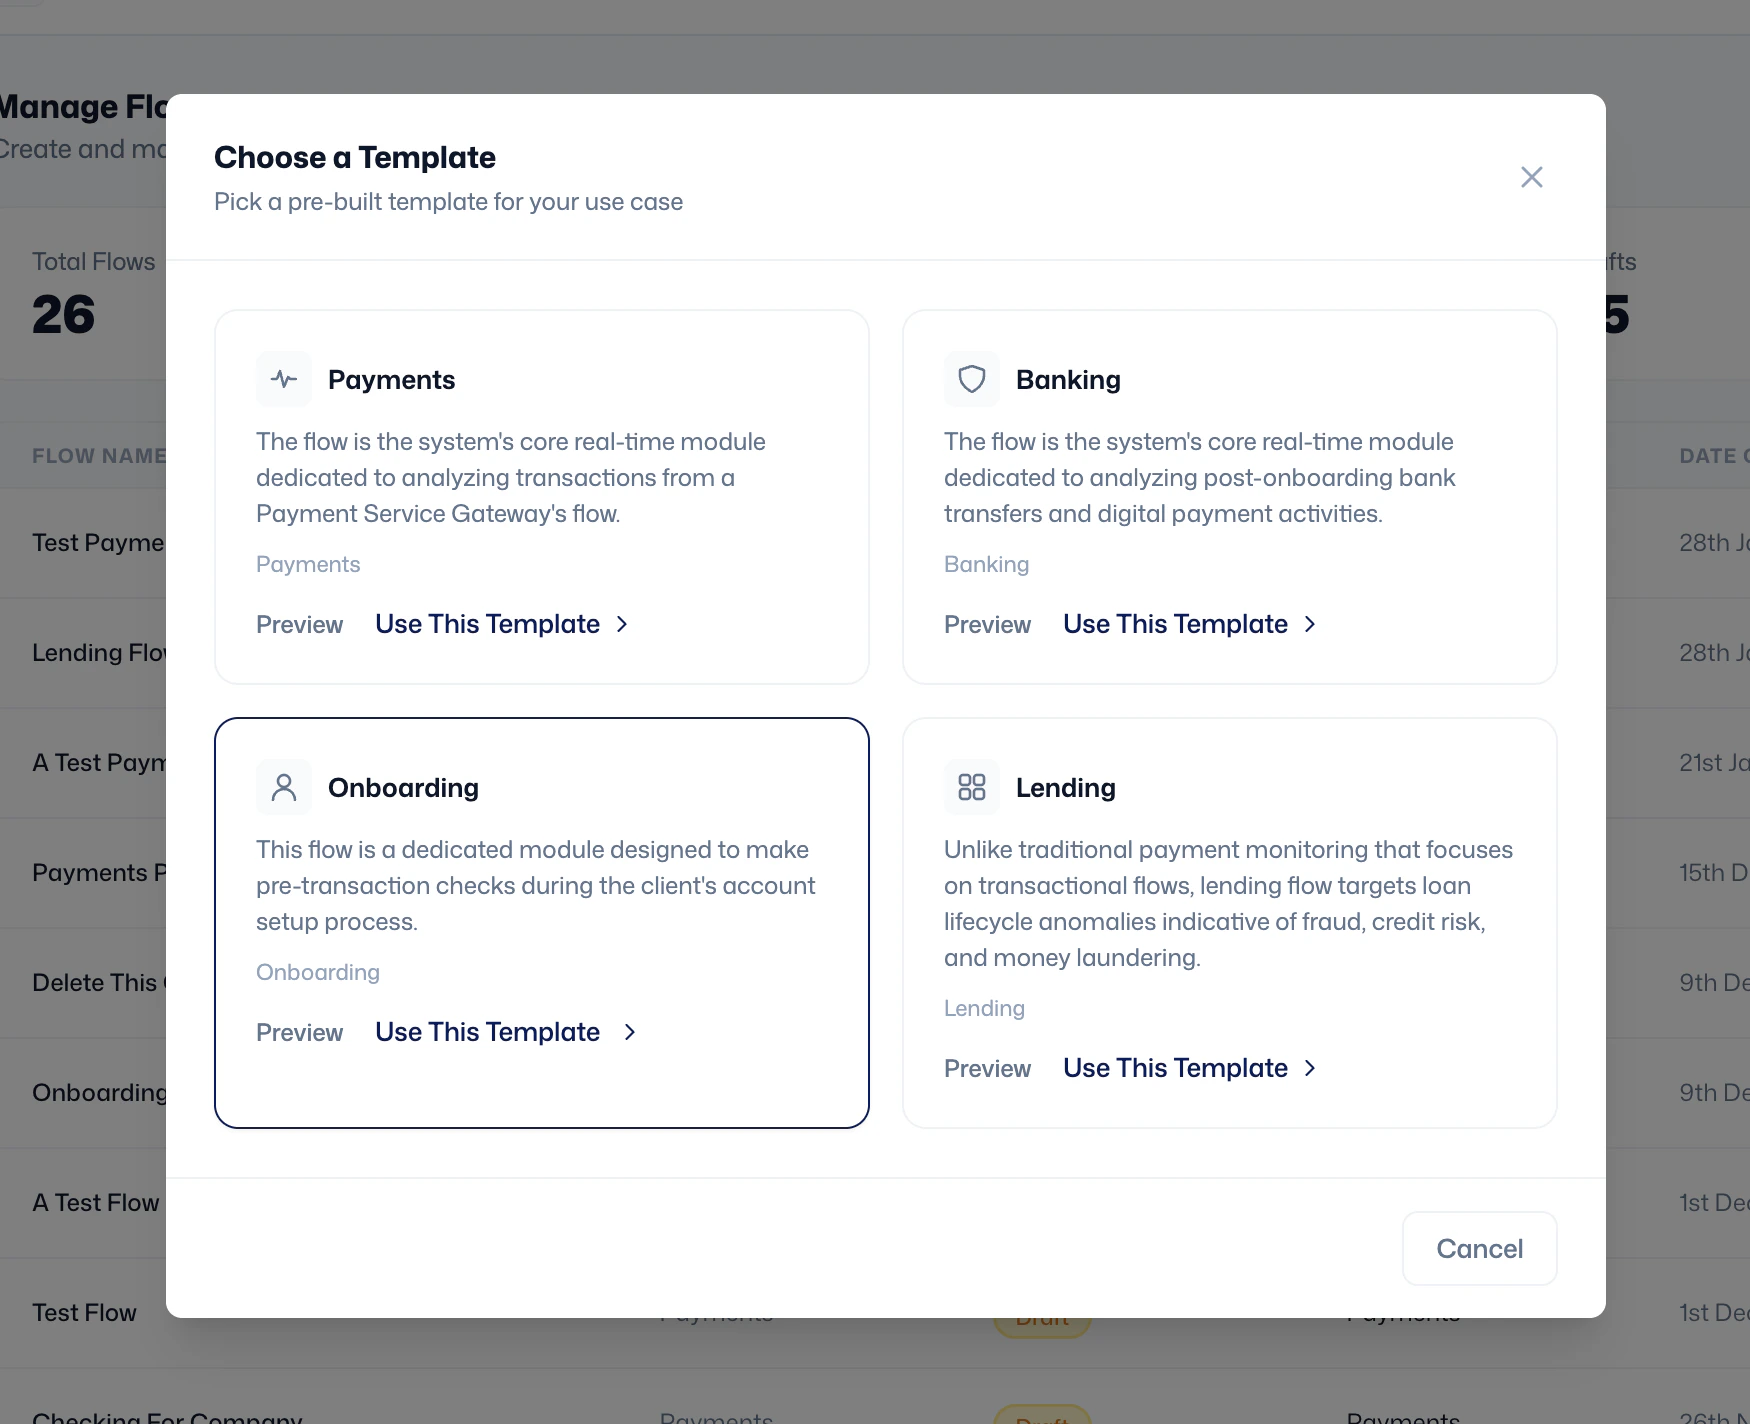
Using Flow Templates: Flow Templates provide you with popular and vetted rule sets to help you get started quickly.
- Access Flow Templates by clicking on the “select template” button in the modal after clicking on “create flow”.
- You will see a list of available templates. Click the “preview” button on a template to see the rules it contains, including their risk levels and scores.
- If a template meets your requirements, click the Use this flow button in the top-right corner.
- You will be prompted to enter a name for your new flow.
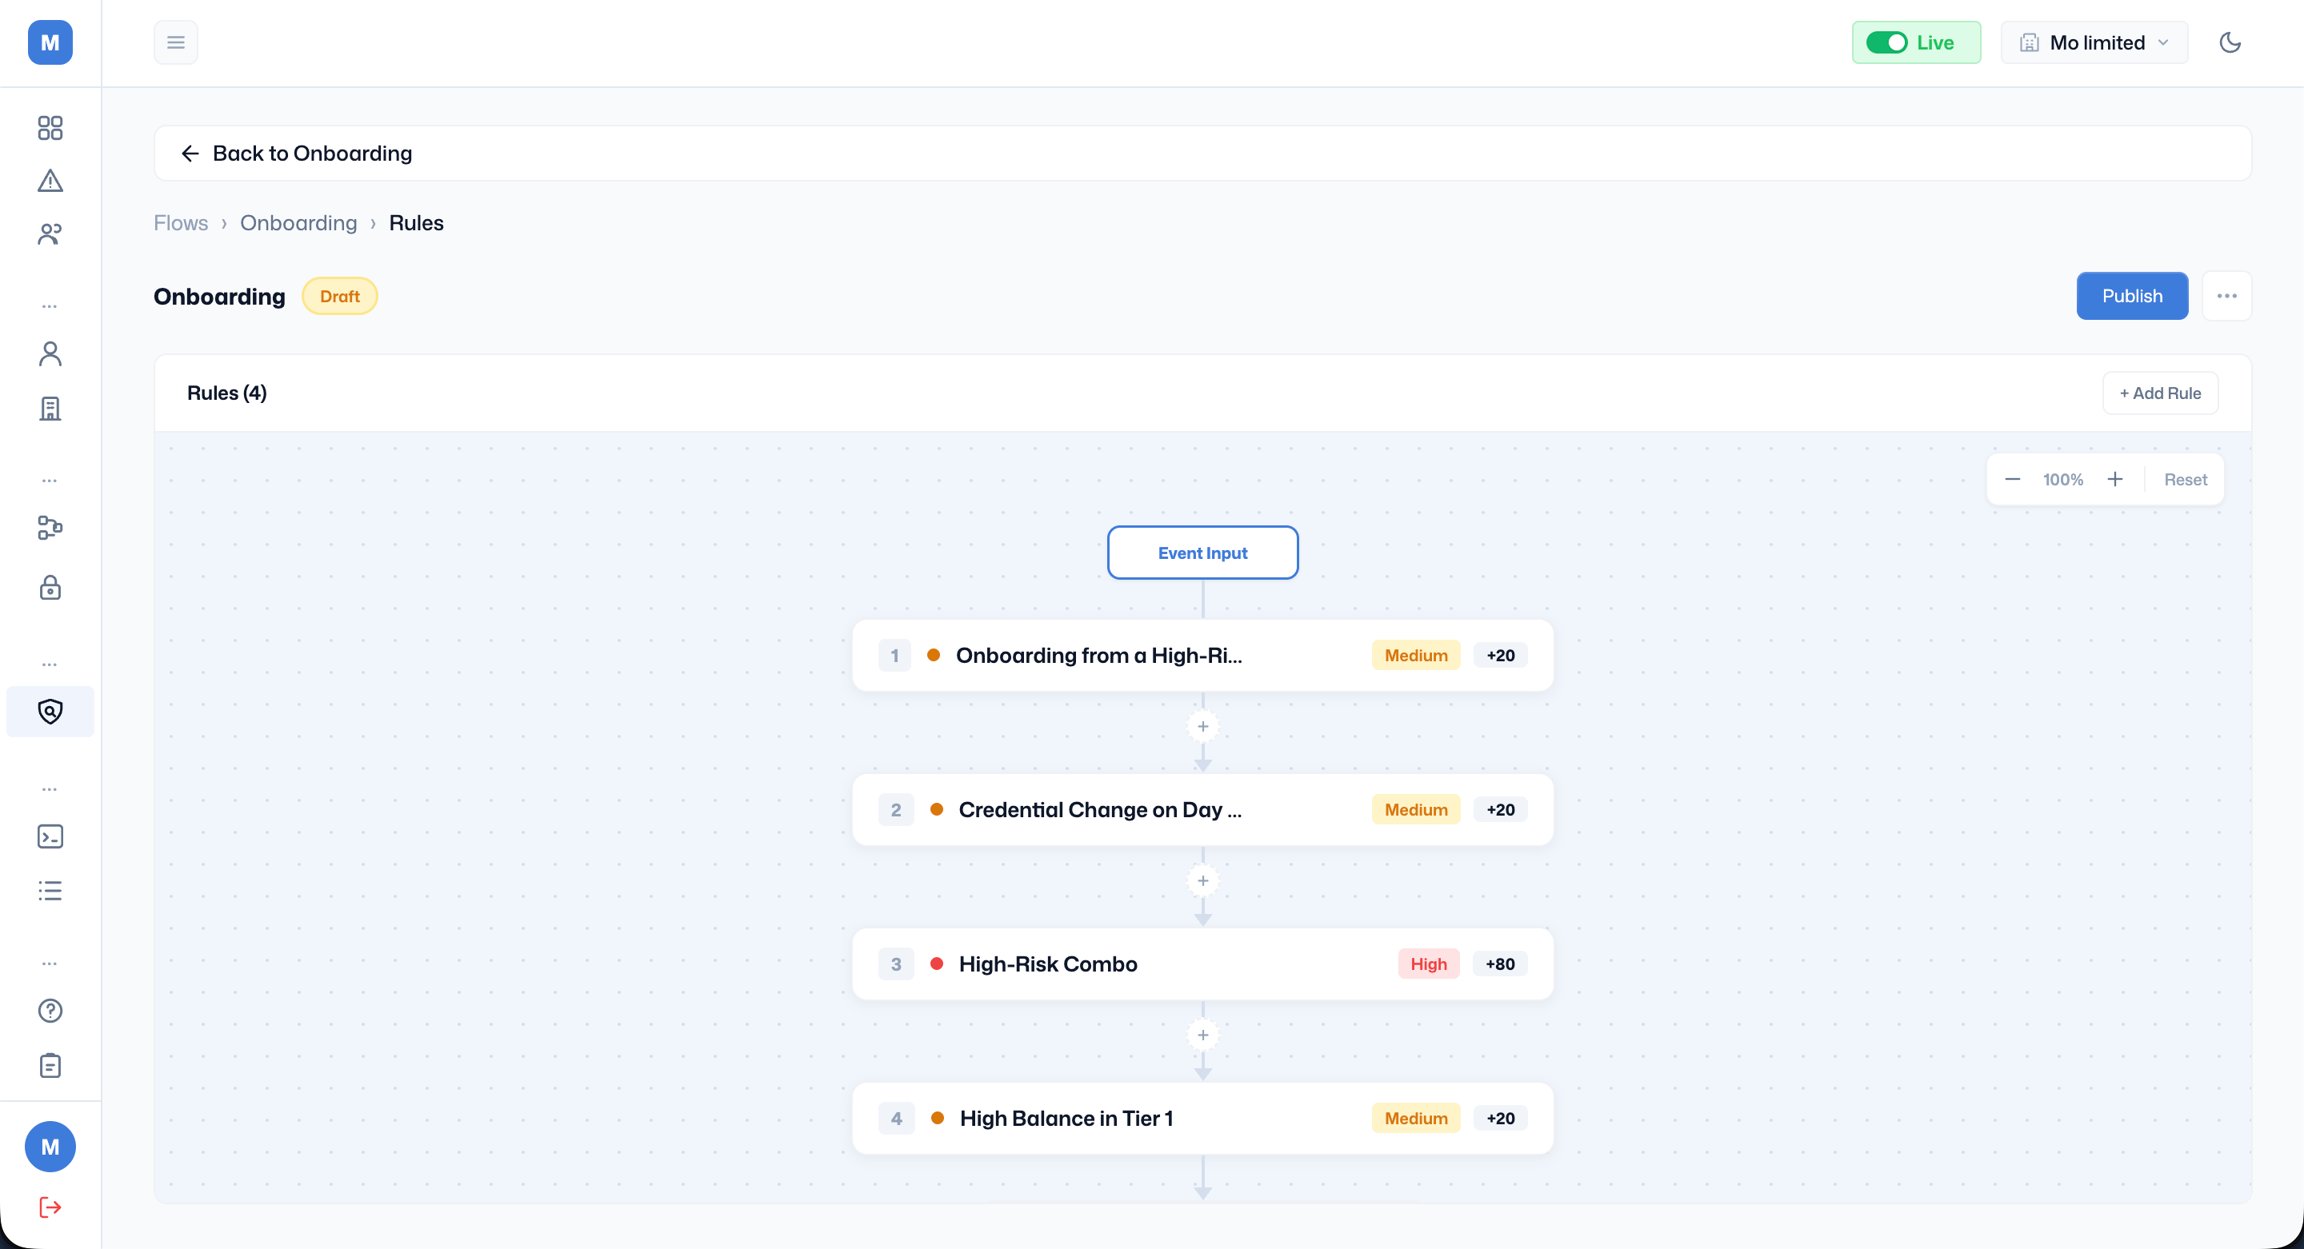
- After you select Confirm, you will be redirected to the Rule Editor within your newly created flow, where you can begin making adjustments if needed.
Viewing a flow
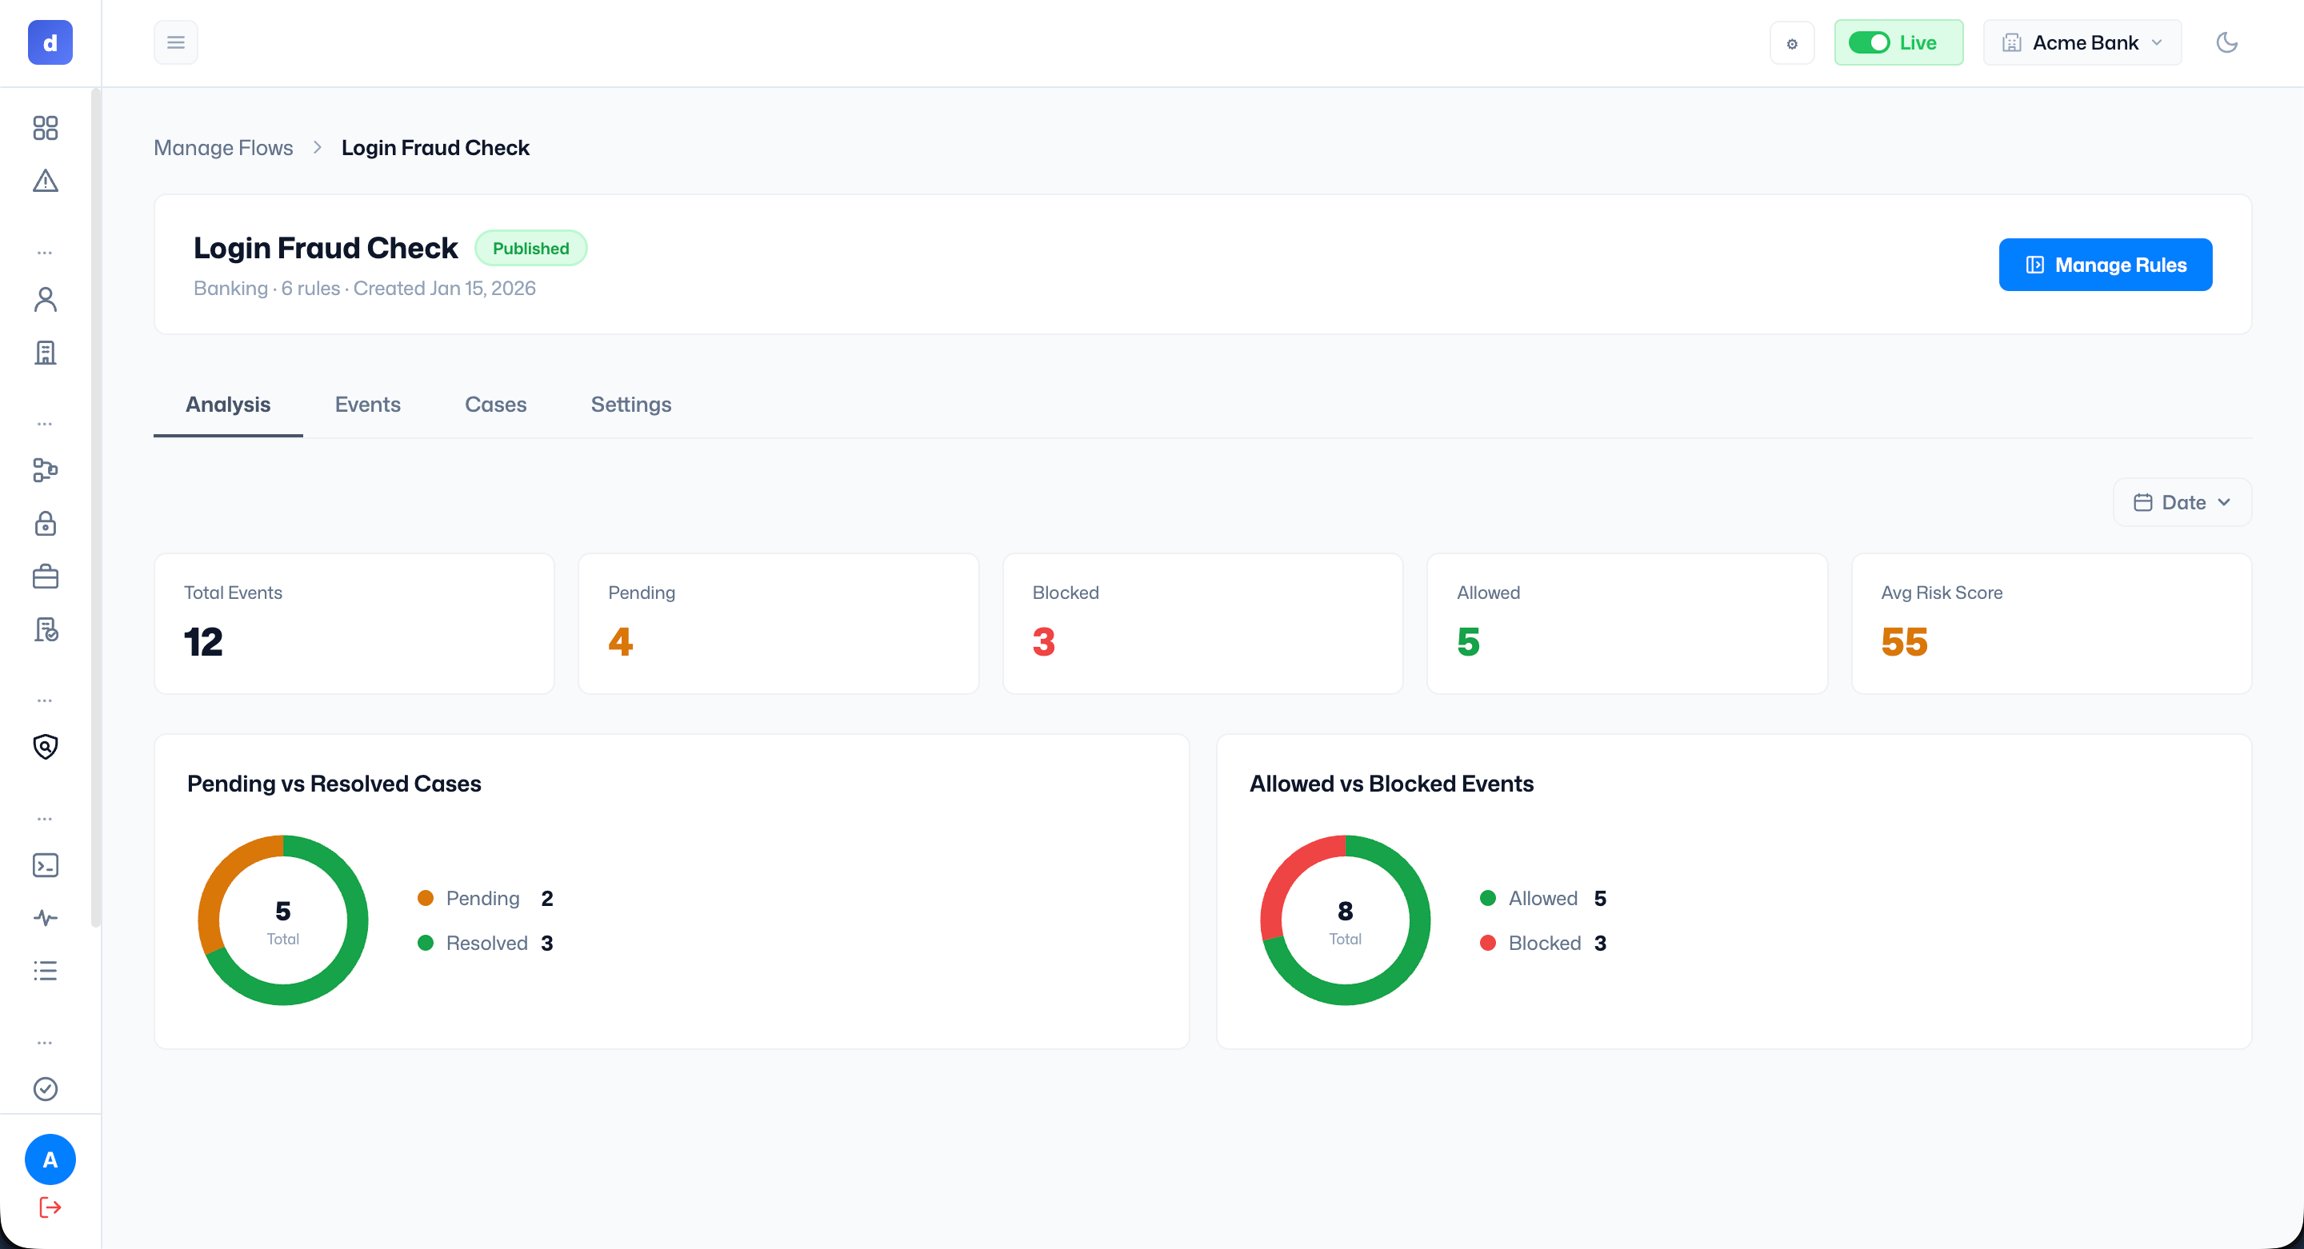
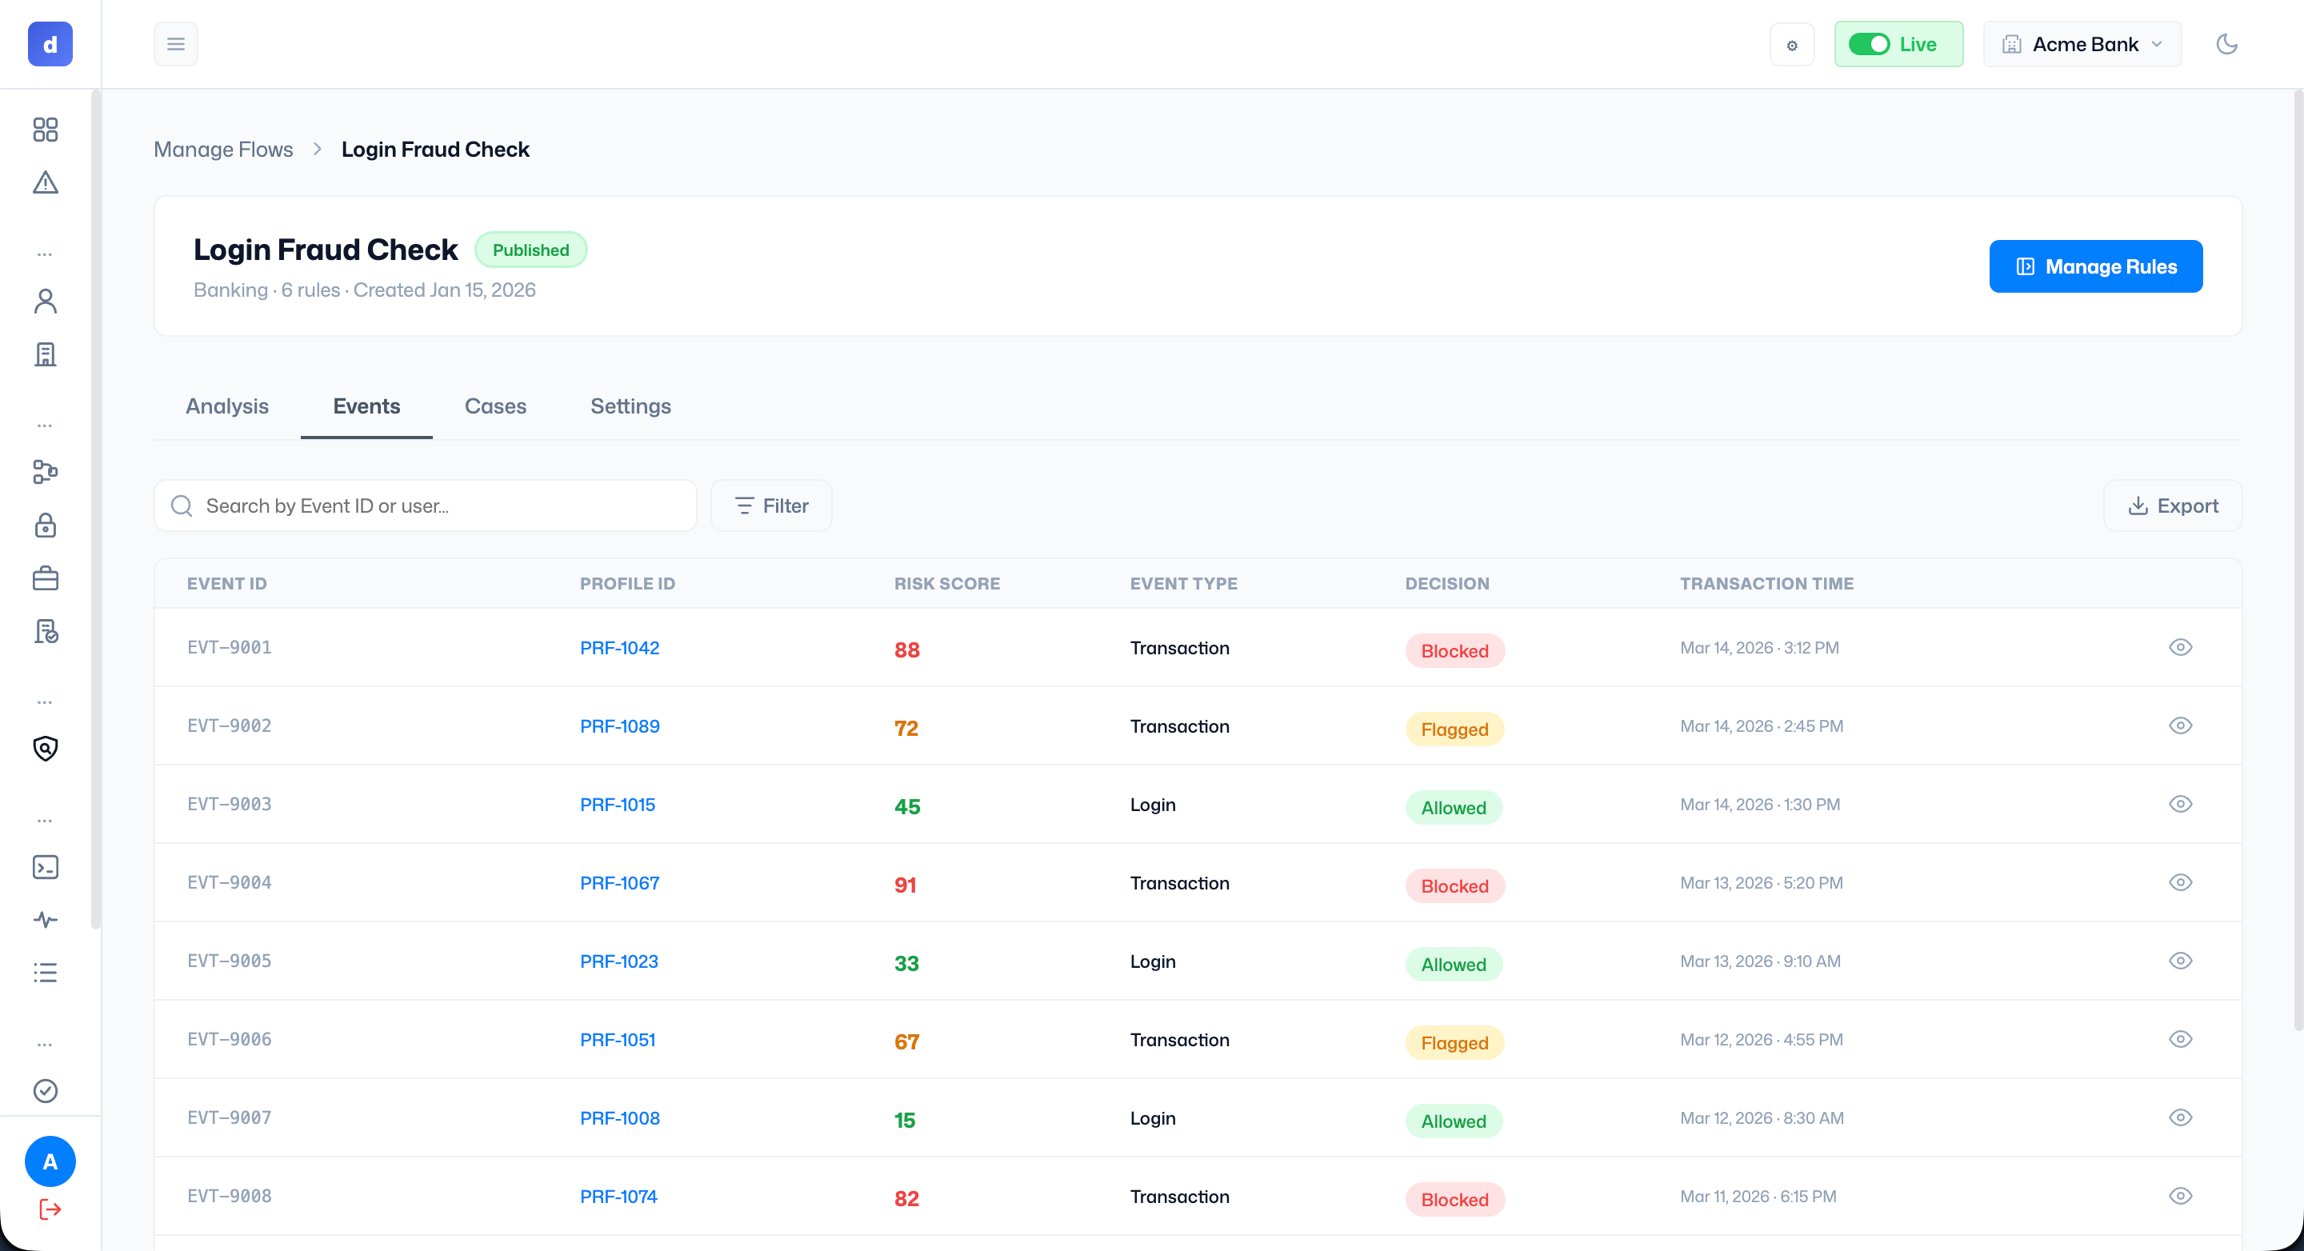
Click a flow name to open its detail page. At the top you’ll see the flow name, published status, use case, rule count, and creation date. Click Manage Rules to open the rule builder. The detail page has four tabs:- Analysis: performance metrics for the flow, including total events, pending, blocked, allowed, and average risk score. Charts show pending vs resolved cases and allowed vs blocked events.
- Events: all events processed through this flow.
- Cases: all cases generated by this flow.
- Settings: flow configuration options.
Settings
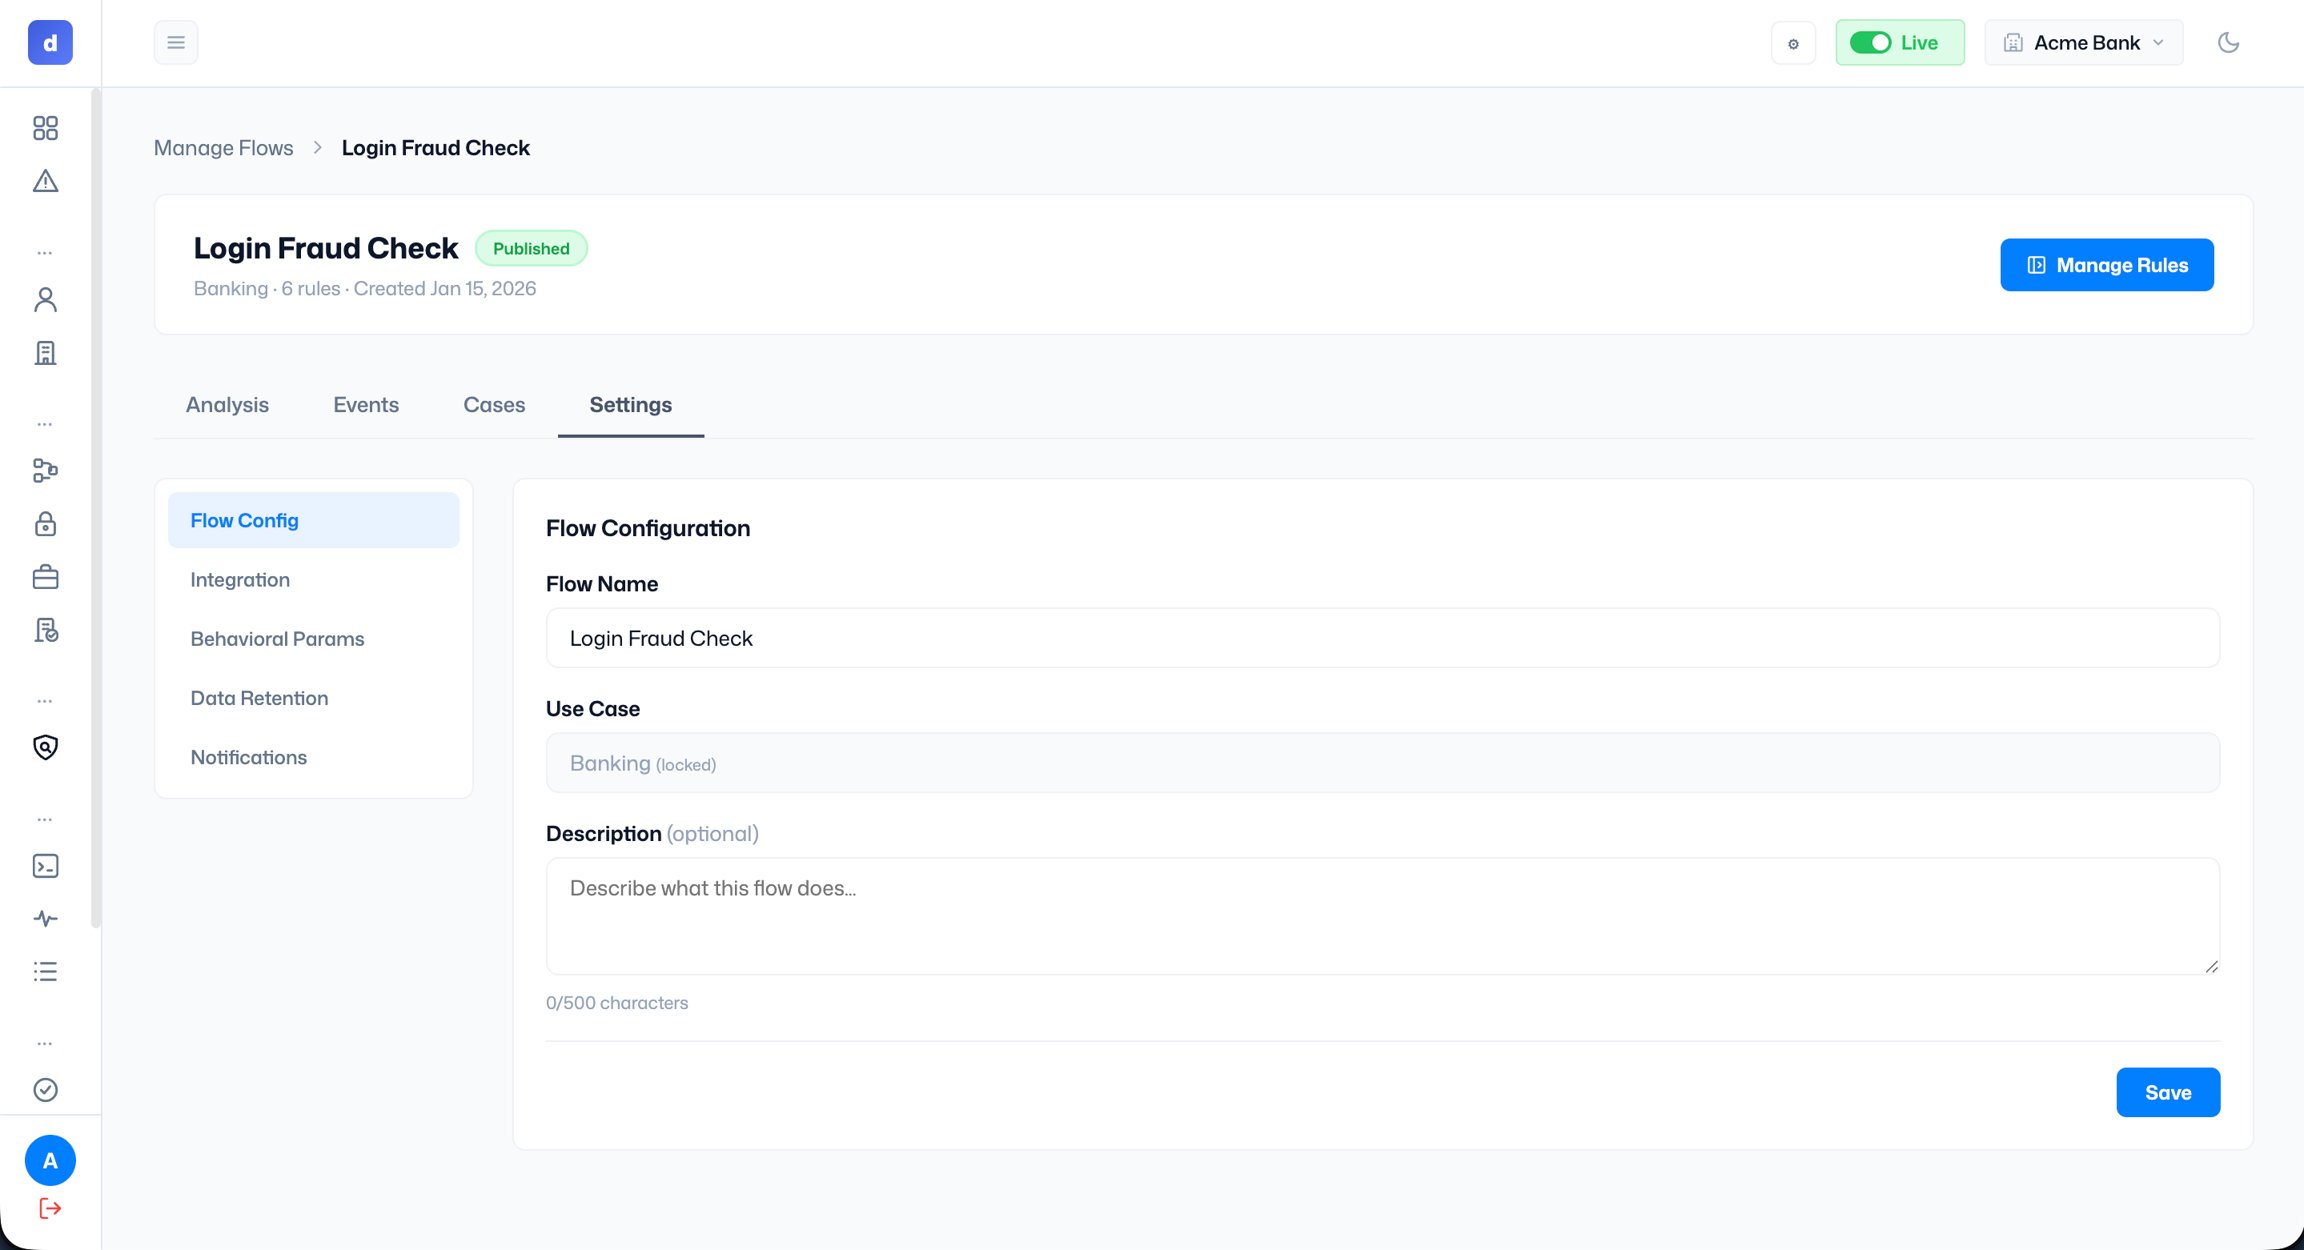
This is where you manage the administrative details of your flow.- You can edit the following:
- Flow Name
- Description
- Webhook URL
- Behavioural parameters
- Emails to receive case notifications
Managing Rules (Rule Editor)
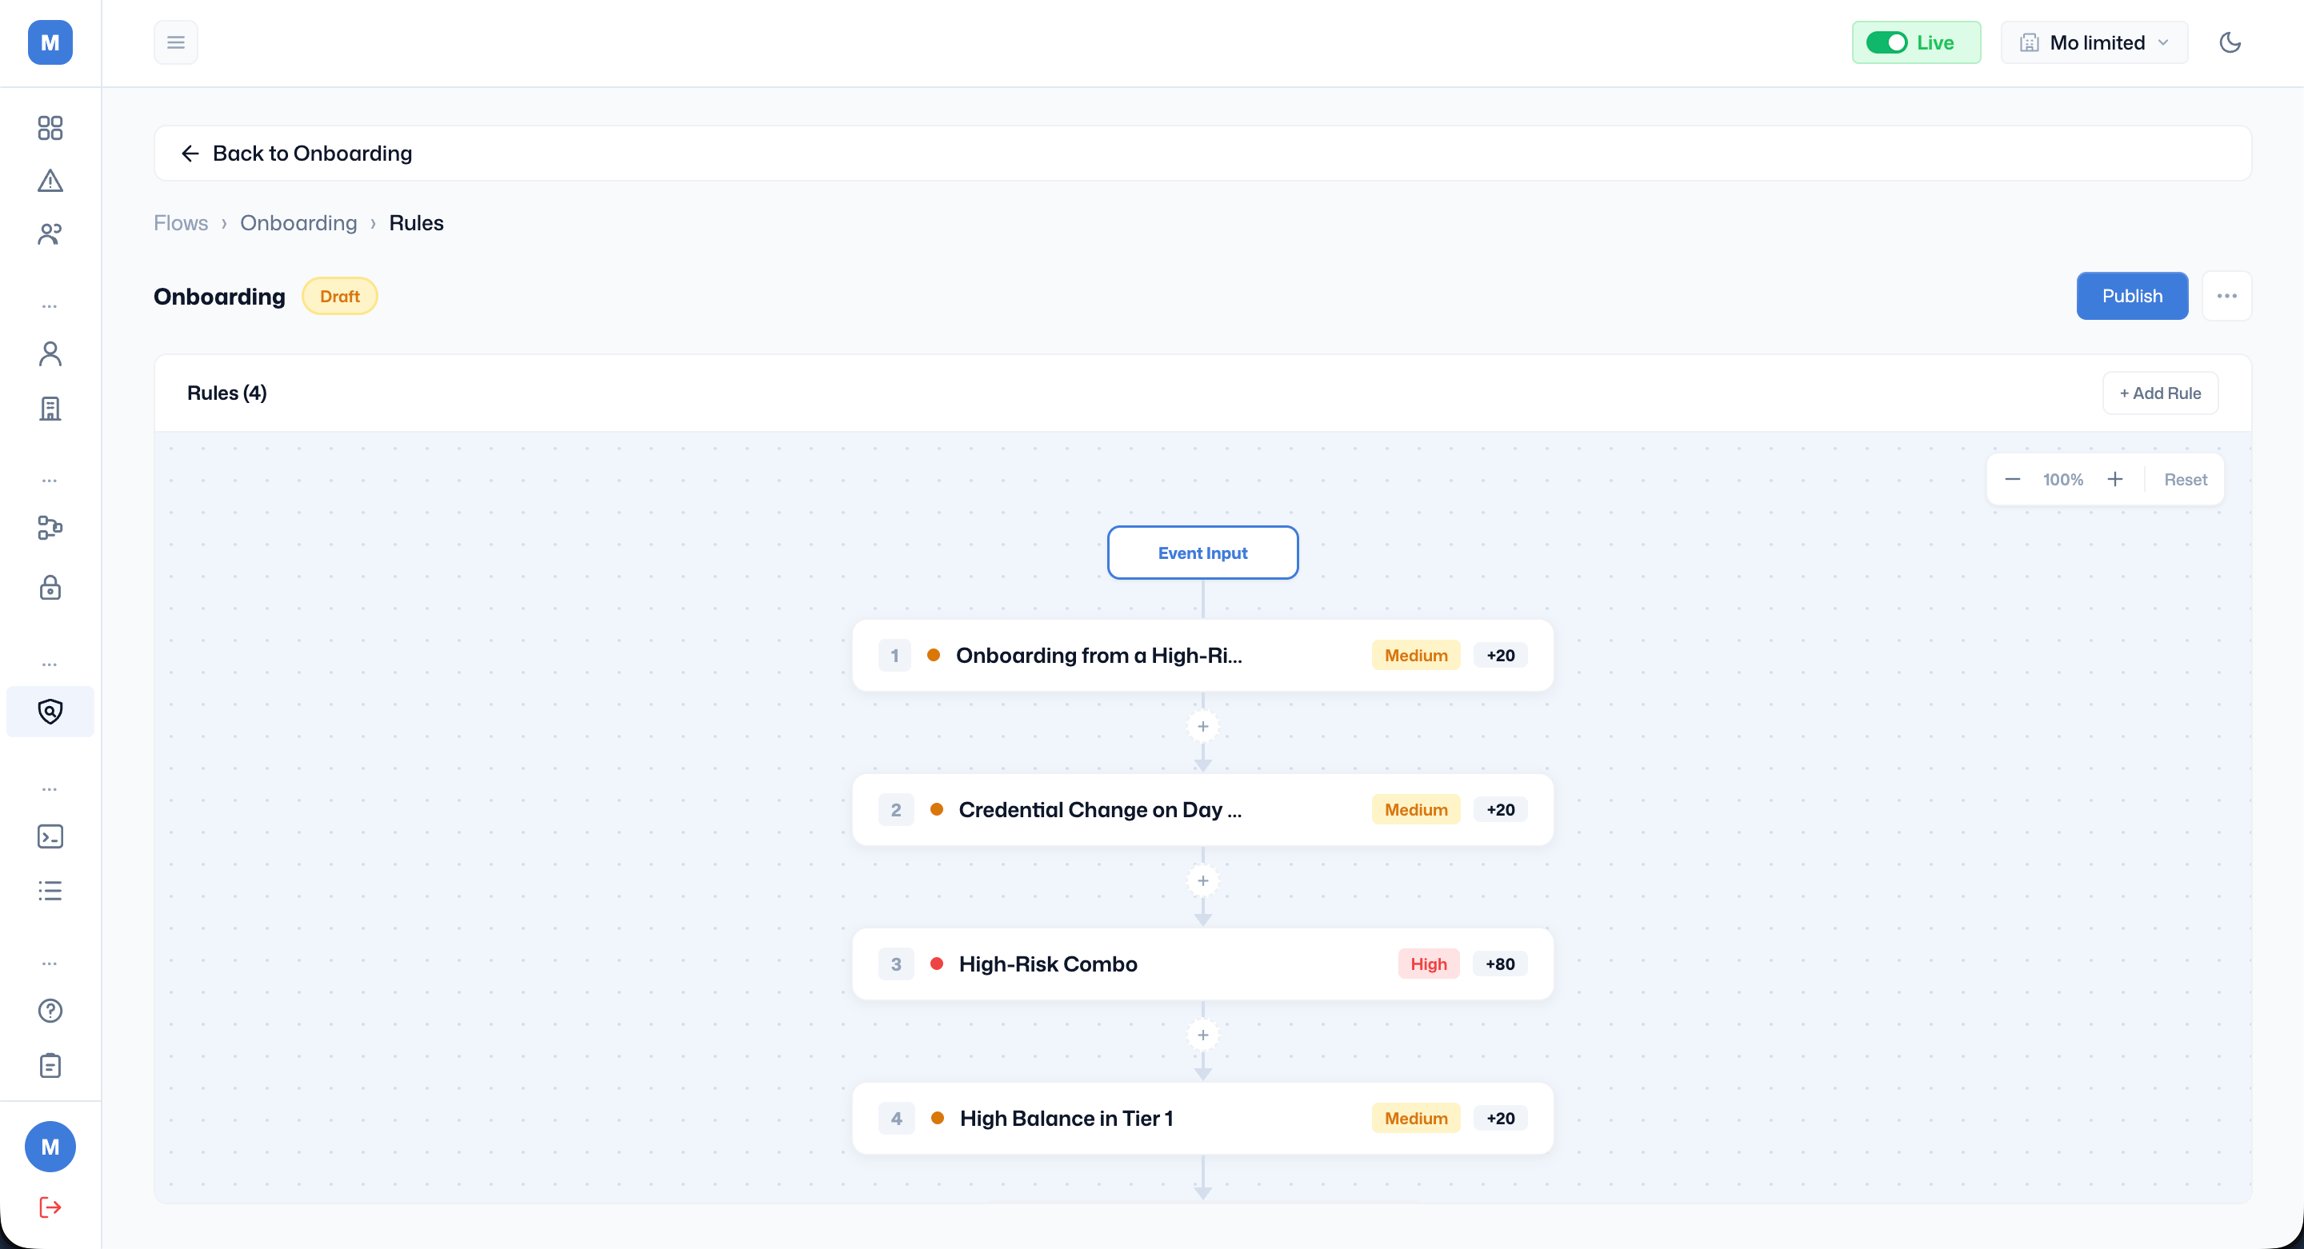
The Rule Editor is a powerful visual canvas where you build and manage the logic for your flow. Adding a Rule:- Click the “Add (a) Rule” button in the top right side of the canvas.
- Alternatively, click the plus (+) button directly inside the rule editor canvas.
- Setting up a Rule:
- When you add a rule, a form appears on the canvas.
- You can configure its Name, Description, Rule Score, and Rule Type (High, Medium, or Low).
- In the rule setup form, use the interactive section to add conditions.
- Select a Field (e.g., Transaction) and a Sub-field (e.g., Transaction amount).
- Choose an Operator (e.g., equals).
- Provide a Value (e.g., 10000).
- This will appear on the canvas as: Transaction amount = 10000.
- Deleting a Rule or Condition:
- Use the delete button that appears when hovering over a rule in the canvas.
Saving and Publishing a Flow: 1. Save: After editing, you must first click Save Draft. A toast message will appear confirming that the flow is saved. 2. Publish: After saving, click the Publish button. A pop-up will appear asking you to confirm, as publishing will make the rules go live instantly.
- Select Confirm and publish rules to activate your flow.
- Click the Version History button after clicking the hamburger menu at the top right corner of the screen.
- You can select a past version to view it and choose to roll back to it if necessary.
Managing Decisions
This section controls how the flow makes a final decision on an event after it has been evaluated by your rules.- Use the input fields to configure what status a given rule score represents. For example:
- A score between 0 and 20 is Good.
- A score between 21 and 70 is Pending (sent to cases for review).
- Once you are done, click “save draft”. You can also reset the settings to their original state by clicking on “Discard Changes”.
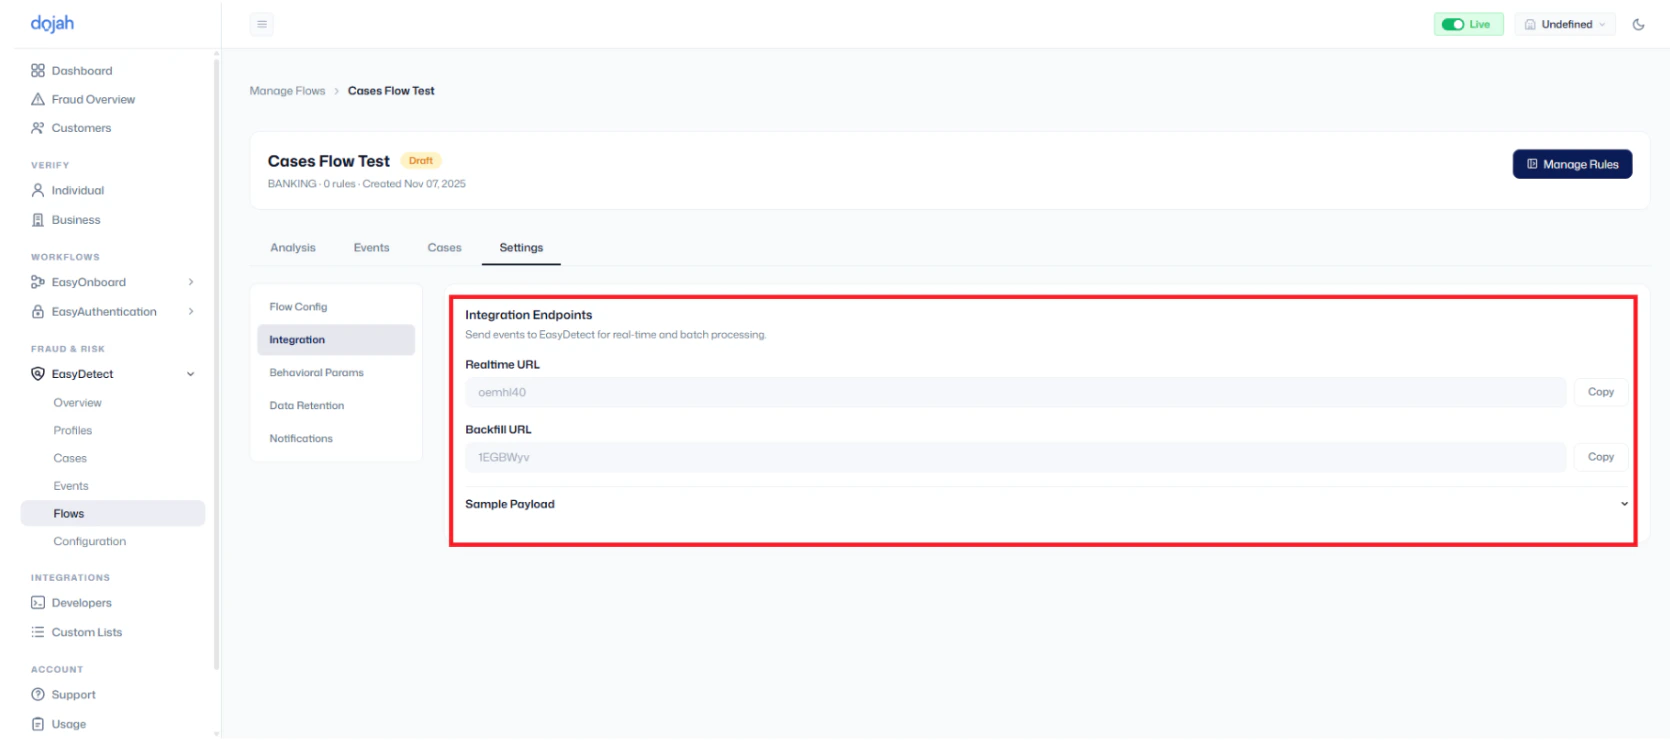
- Realtime / Ingest URL
- This URL is used to send live events to your flow. Easy Detect will process these events in real-time against the rules you have set.
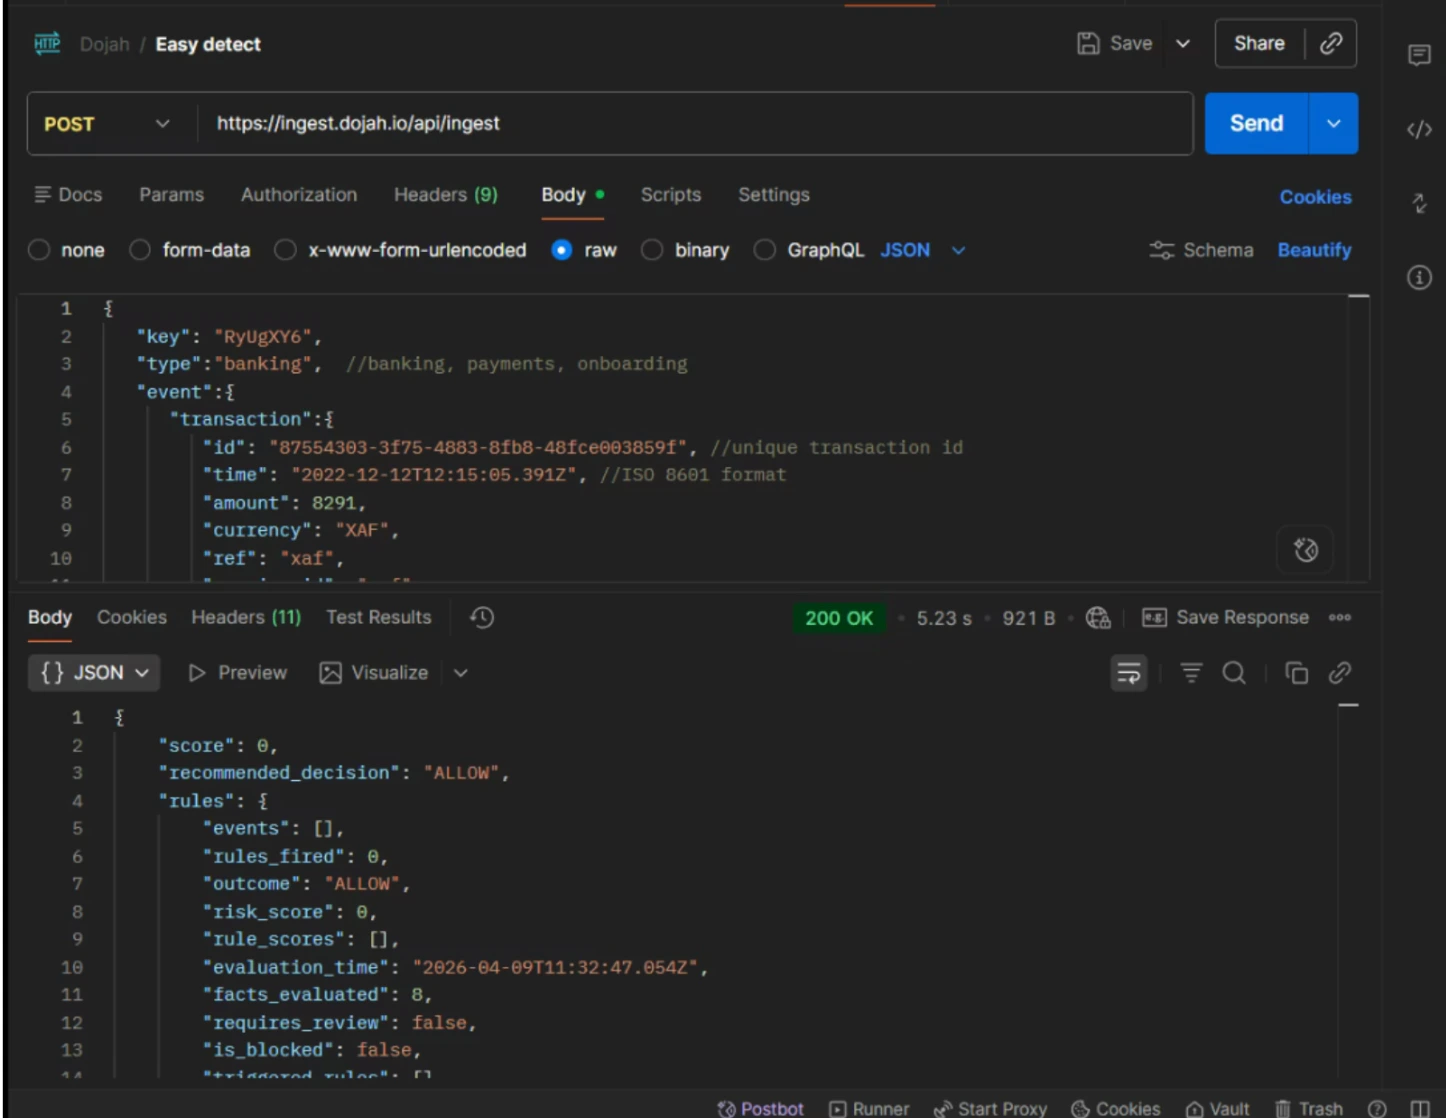
- Enriching Your Flow with Historical Data (Backfill URL)
- This URL is used to send past transactional data to Easy Detect.
- This historical data is used to enrich the system’s understanding of normal account behavior, which is essential for our ML and AI analysis features.